How To Automatically Create Google Docs from Templates with Make and Carbone


The Basic Google Docs Templating
Google Docs provides a solution for creating templates: Open a document and insert variables wherever you want to pull in text. A variable consists of two sets of open brackets, a variable name, and two sets of closing brackets, such as {{firstName}} , {{email}} , or {{date}}.
To automate document creation, use a workflow automation service like Zapier or Make, and look for the official "Google Docs" module. When creating a new workflow, use the action, use the action "Create a Document From a Template": it creates a copy of an existing template document into your Google Drive, and replace any tags such as {{firstName}}, or {{email}} with data from a dataset.
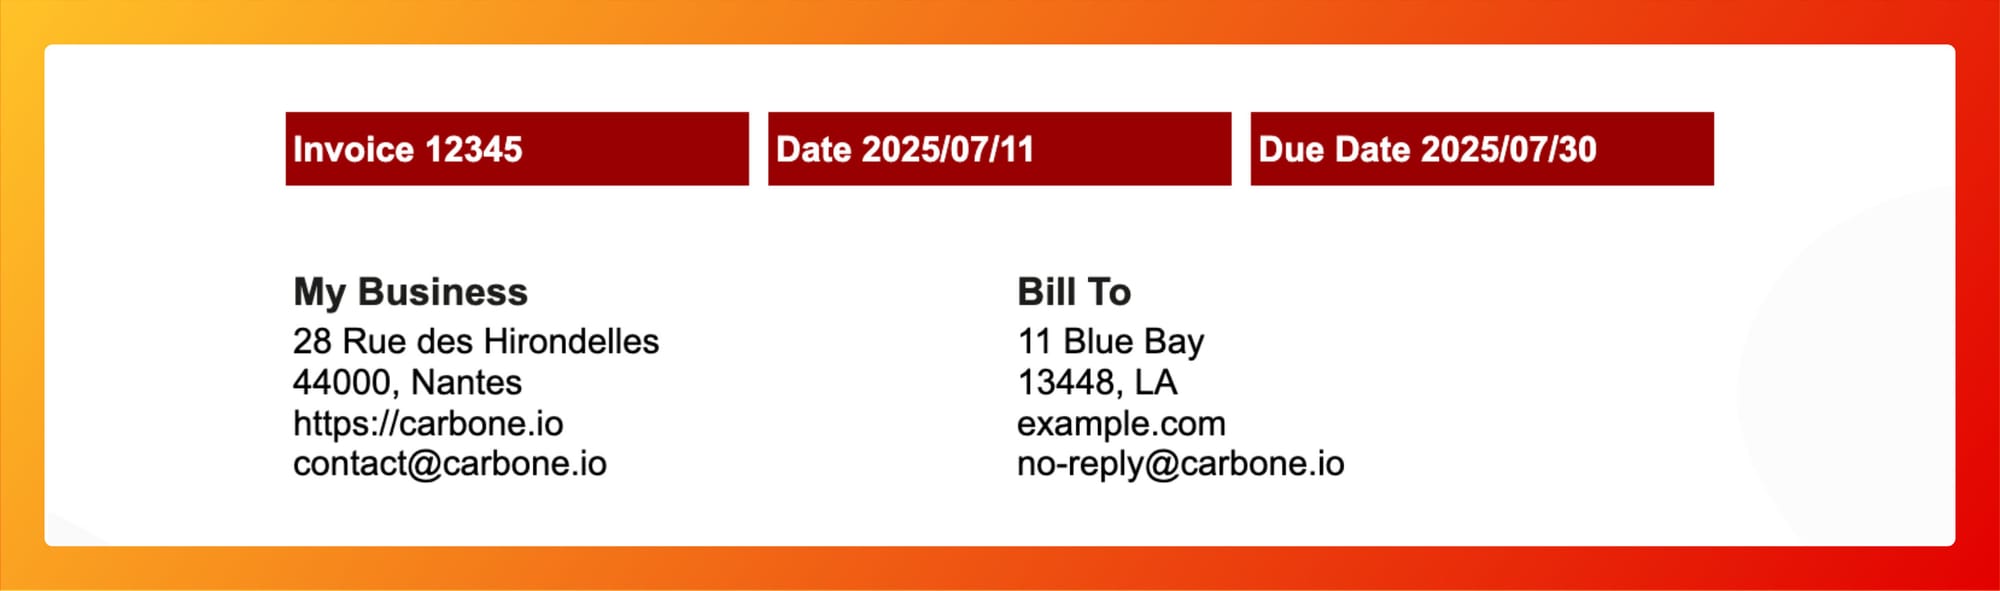
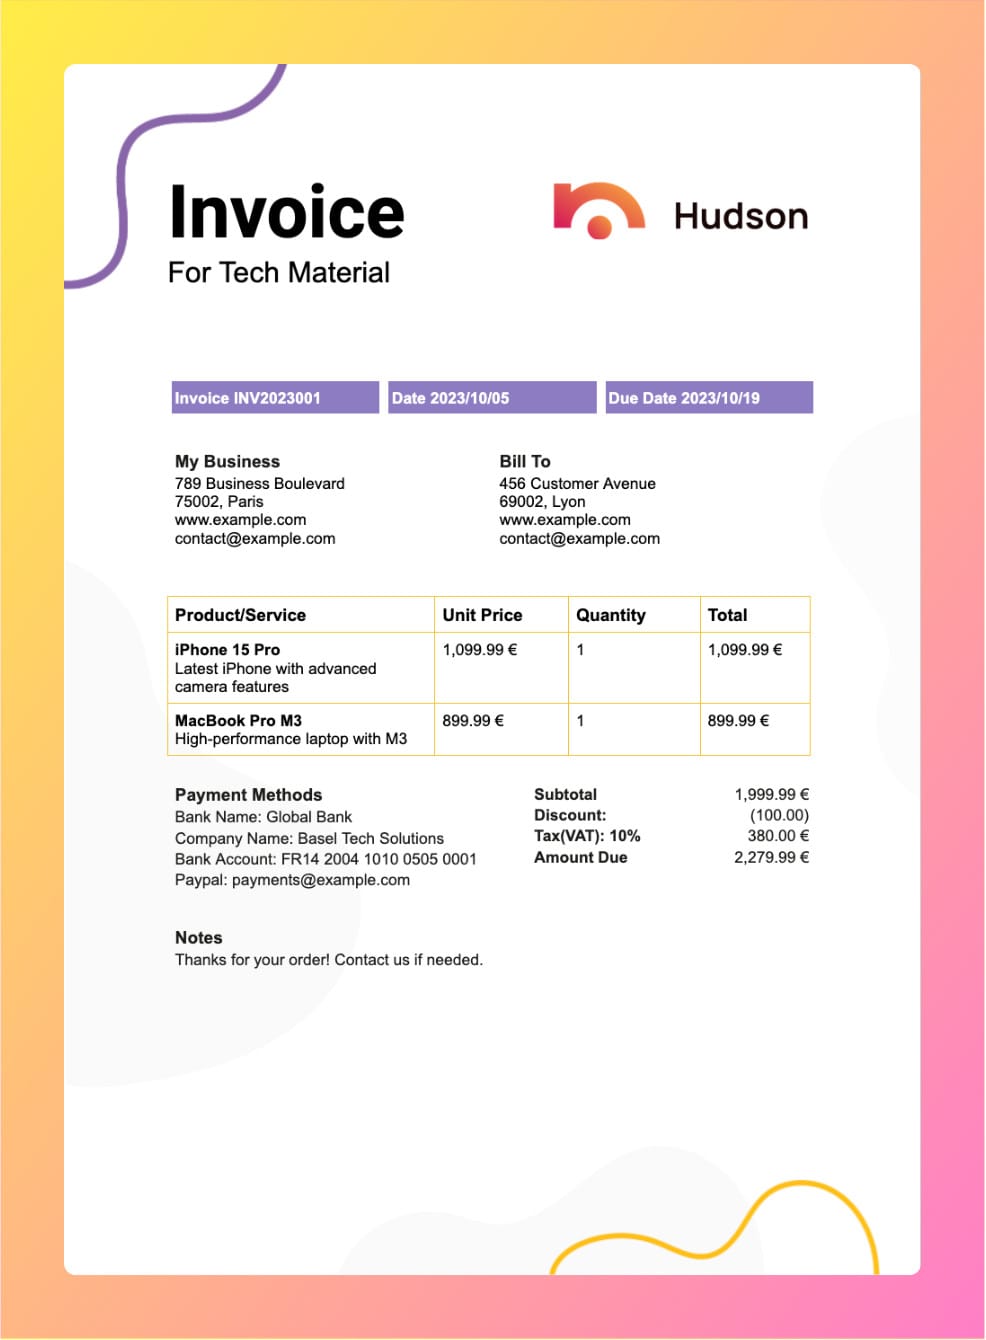
After executing the scenario, the document is generated with the merged data as expected and saved in Google Drive! Here is the result:
However, there are many drawbacks to consider:
- For templating, you can only inject text or images. It does not support injecting a list of elements, such as an invoice composed of a list of products or a bank statement containing a list of transactions. Inserting rich content like charts, barcodes, or dynamic colors is not even a consideration.
- There is no integrated solution to format data, such as numbers, dates, or currencies. Furthermore, printing content conditionally is not possible, like hiding a section or an entire page based on a condition.
- For automation, only two types of documents can be generated: either a Document or a Presentation with the action "Create a Presentation From a Template" from the "Google Slide" module.
The generation of documents using the default Google Docs templating system combined with Zapier or Make is quite limited. While it can handle basic tasks, it falls short when it comes to creating complex and professional documents that require dynamic and rich data insertion.
The Advanced Google Docs Templating with Carbone
Meet Carbone: a universal templating engine that supports all document formats without creative limits.
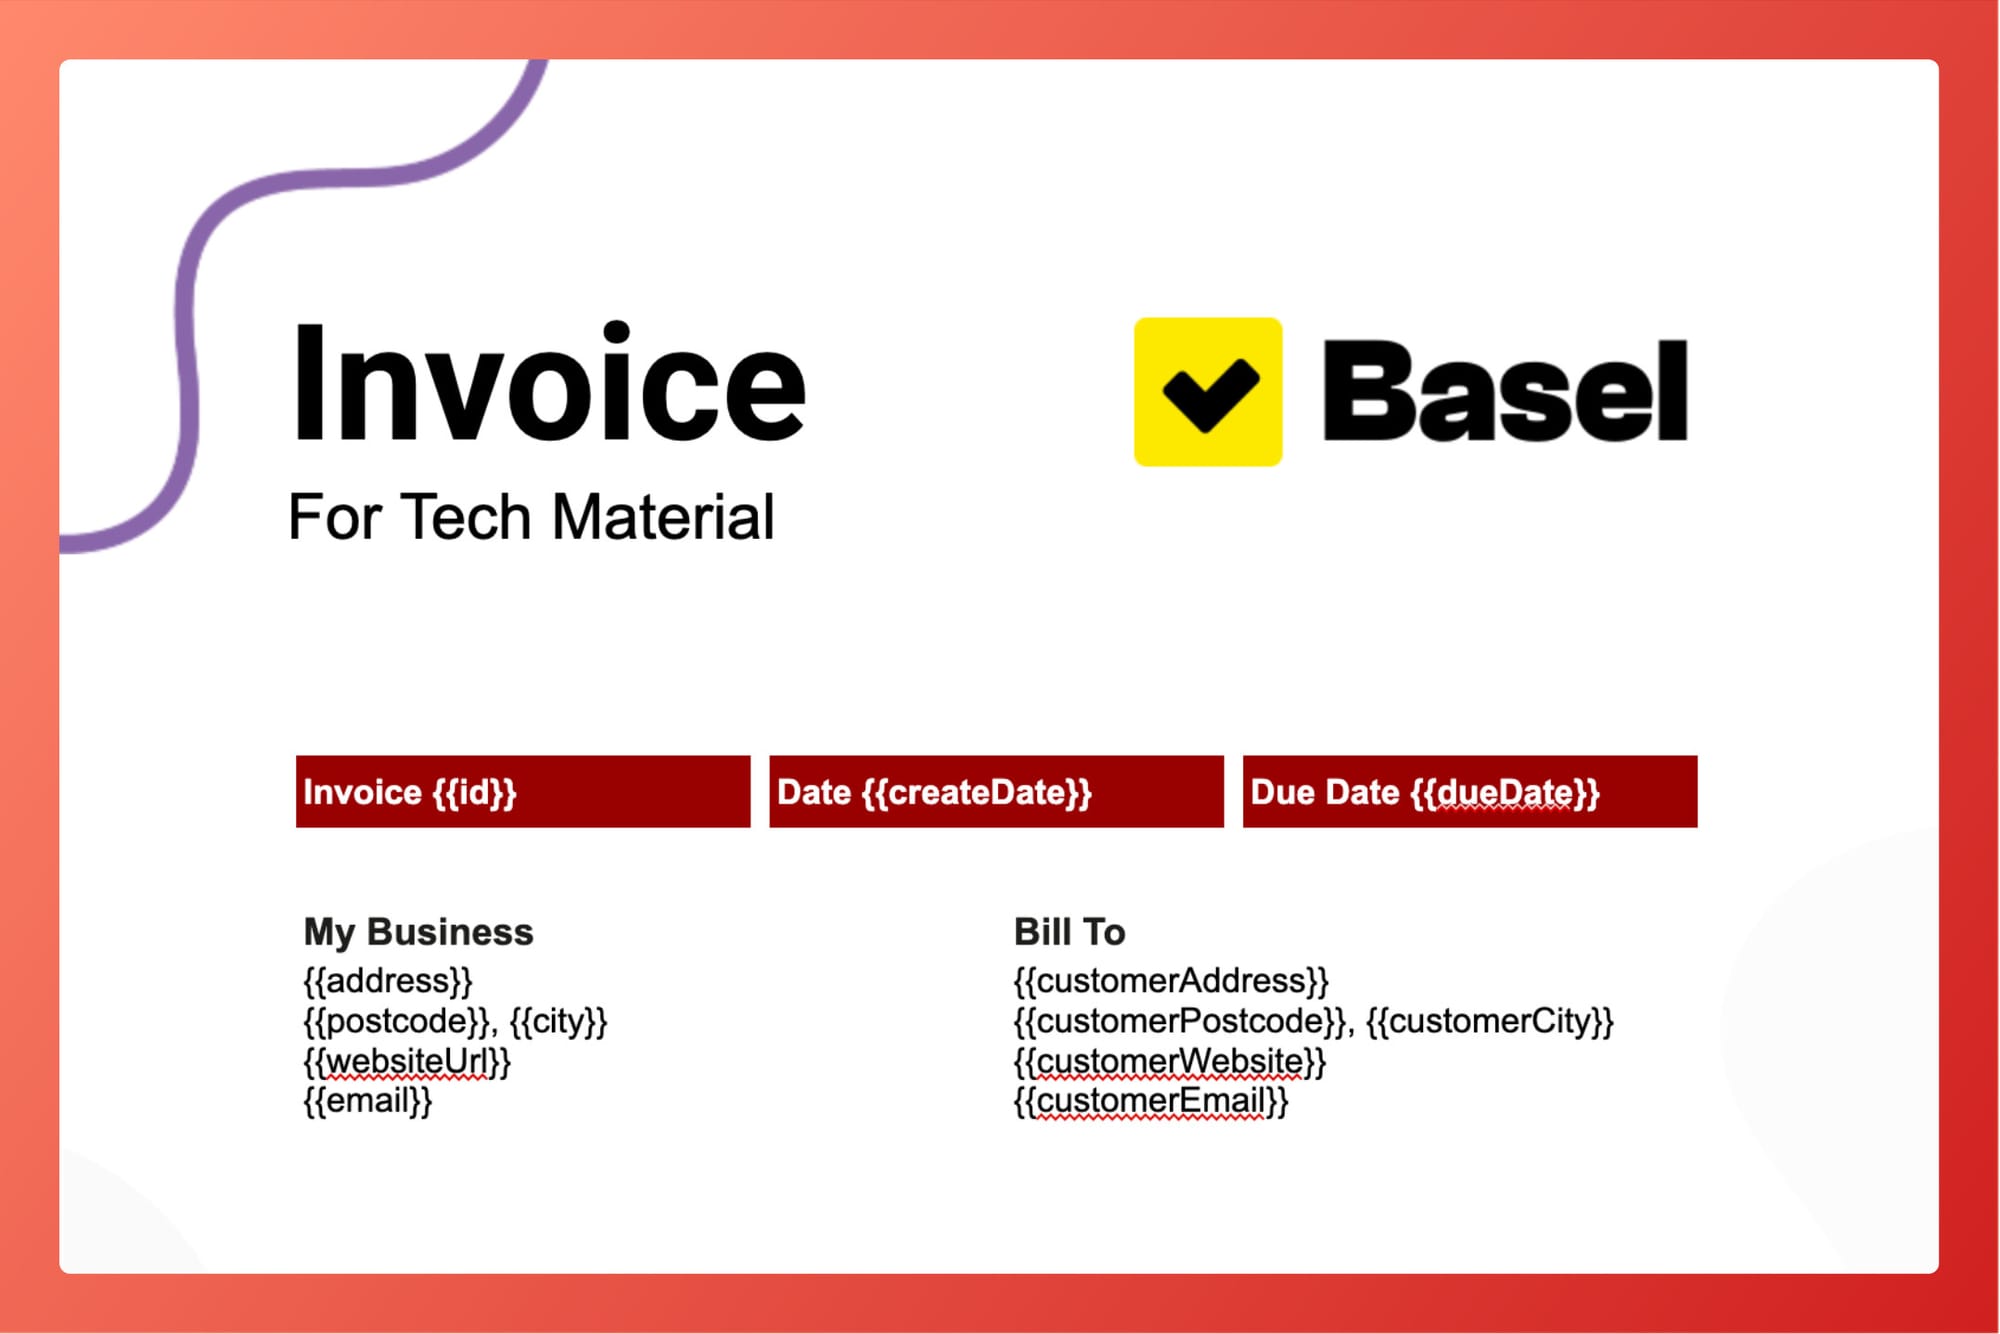
To create a template, open an existing document in Google Doc, and insert Carbone tags: they are placeholders indicating where you want to merge data in a report. It starts with a open curly bracket {, define an field name preceded with d., and close it with a closing curly bracket }, such as {d.firstname}, or {d.email} . If the data is structured as JSON with child lists or objects, define the whole path to the data, there is no limit in dept, for instance: {d.customer.address.city}
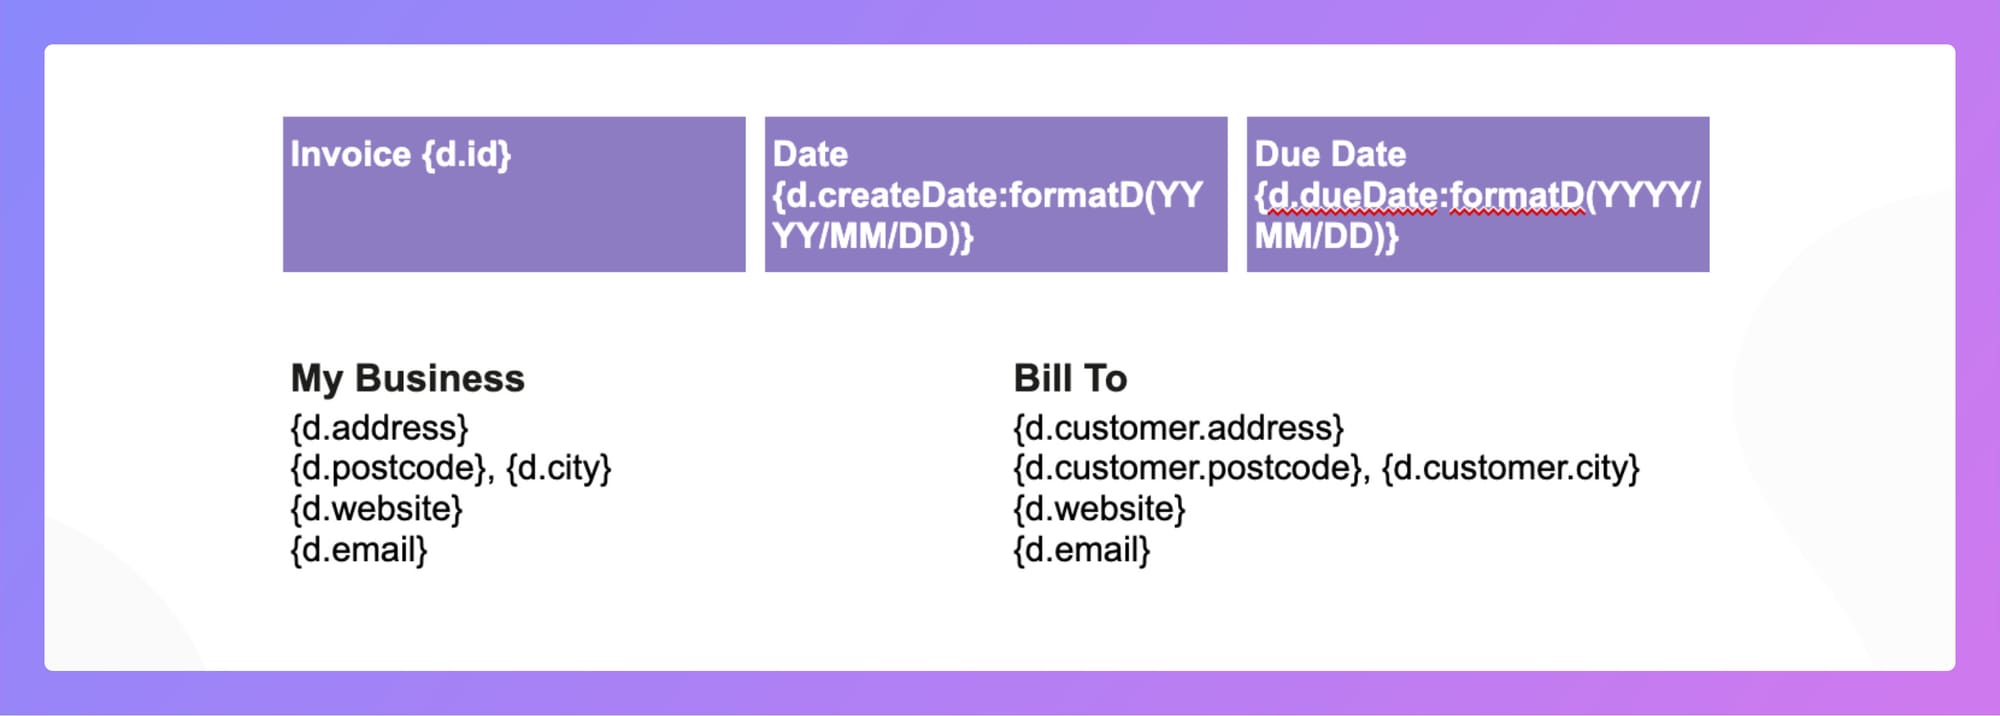
To print a list of elements, access an attribute preceded with [i]. , for instance, to print the price of a list of products: {d.producst[i].price}. In the next paragraph, define the end loop with [i+1] , for instance {d.product[i+1].price} . Every elements between the first tag [i] and [i+1] is considered as repeated loop pattern, it can be any part of a document: titles, tables, rows, pages, and more.

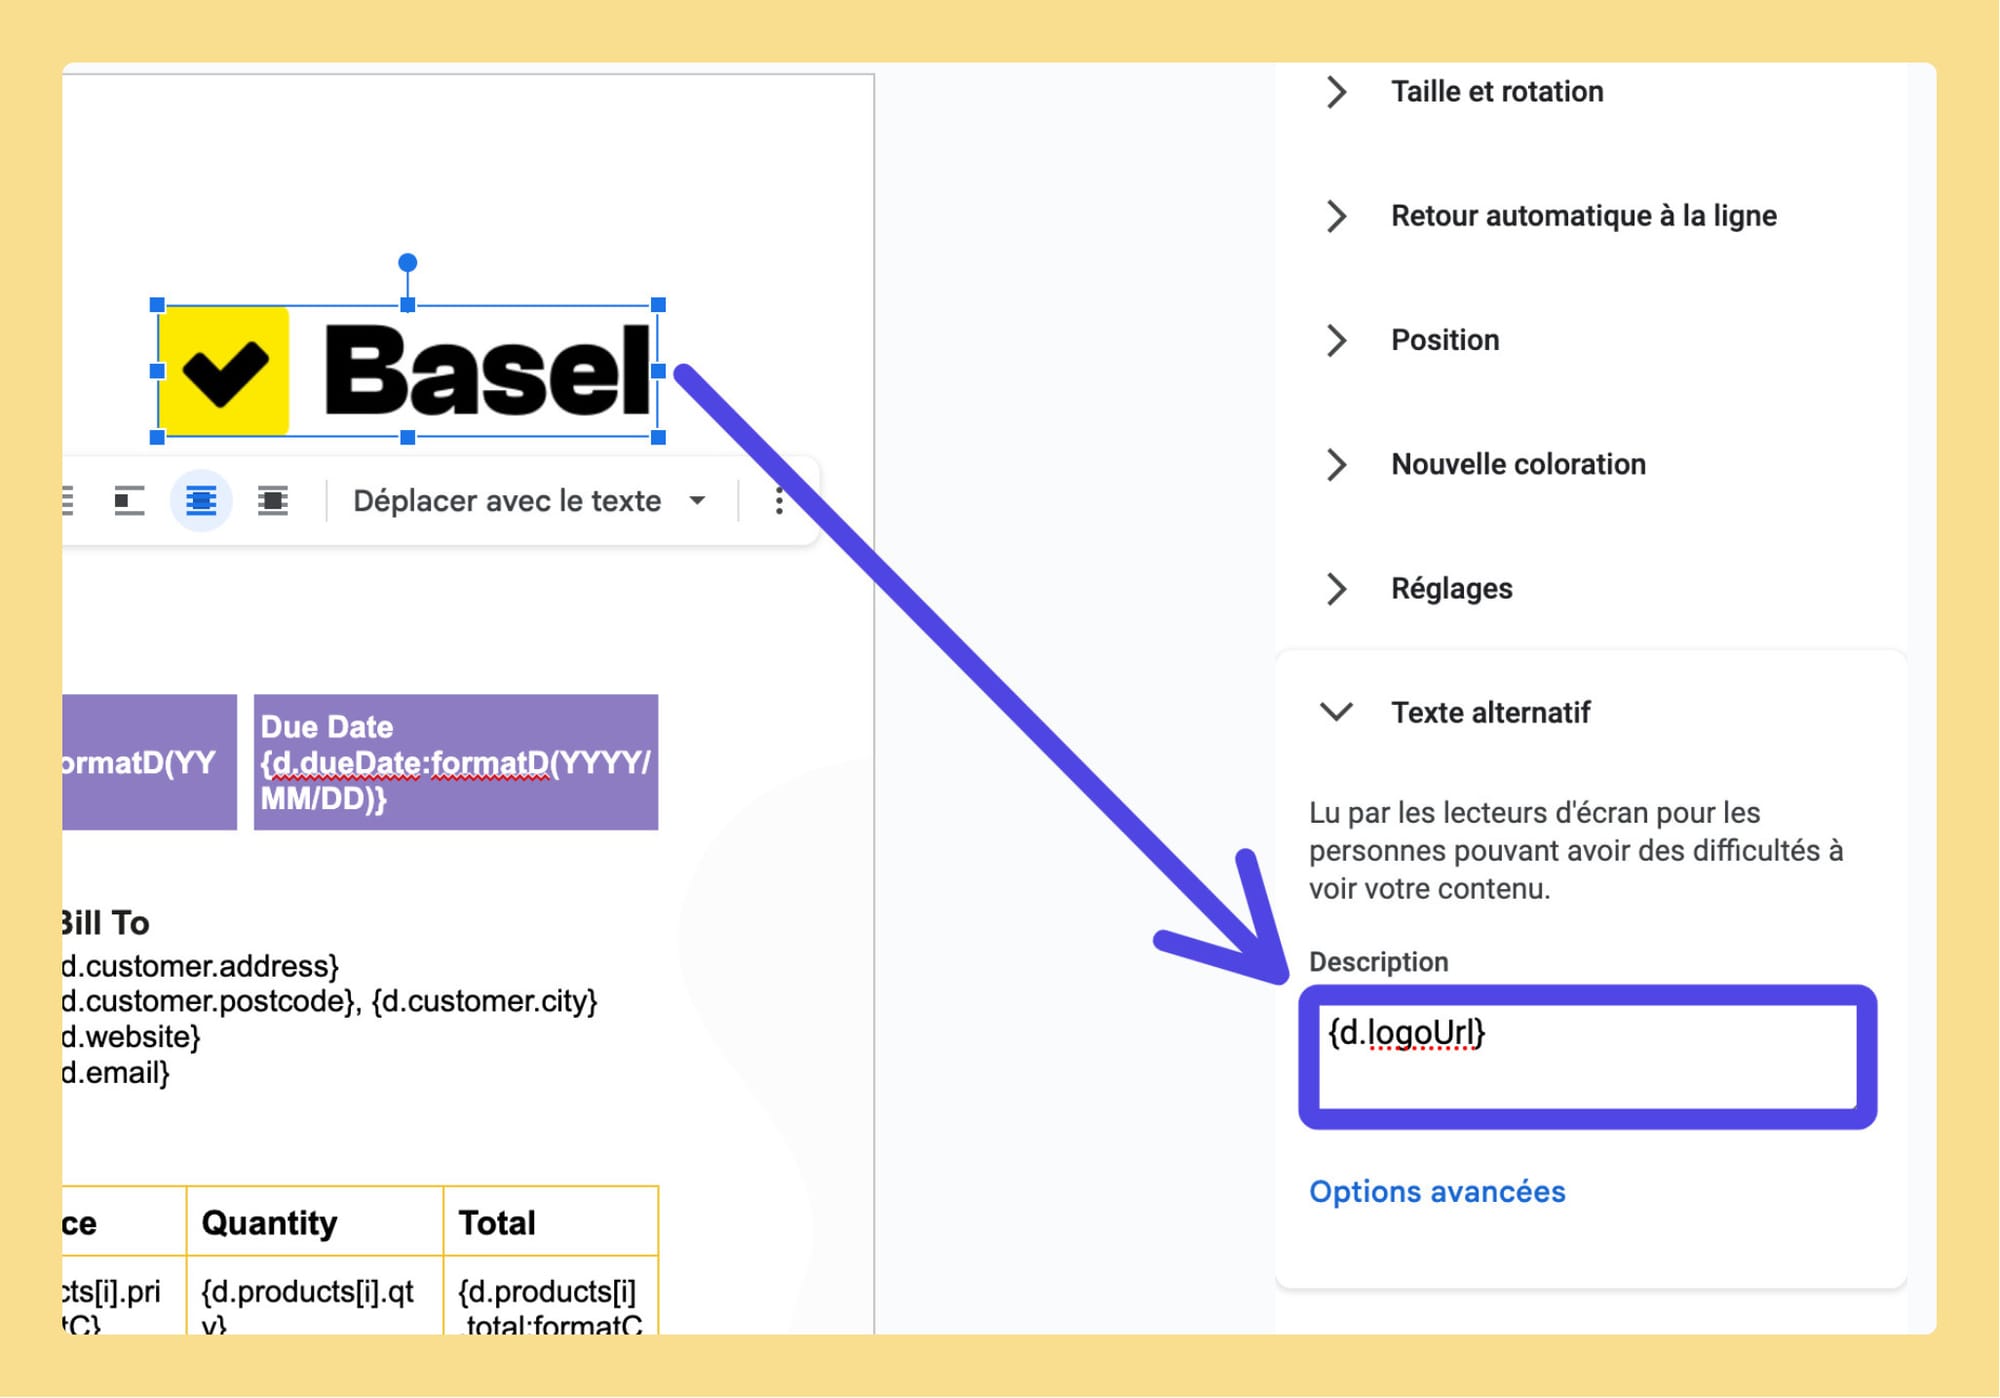
To update the top-right logo with a different one, just set a Carbone tag in the alternative text of the picture!
If the merged data format is not correctly formatted, you can edit the data with "formatters": set of tools to chain at the end of a Carbone tag. For instance, formatting a number with a currency: {d.producst[i].price:formatC}, or aggregating the total price of all product: {d.producst[].total:aggSum:formatC}
Basically, Carbone tags allows to have a total control over all elements in a document and even add rich content such as images, URLs, charts, colors, section, barcodes, HTML from a WYSIWYG editor, and more! Learn more on the Carbone templating syntax on the documentation.
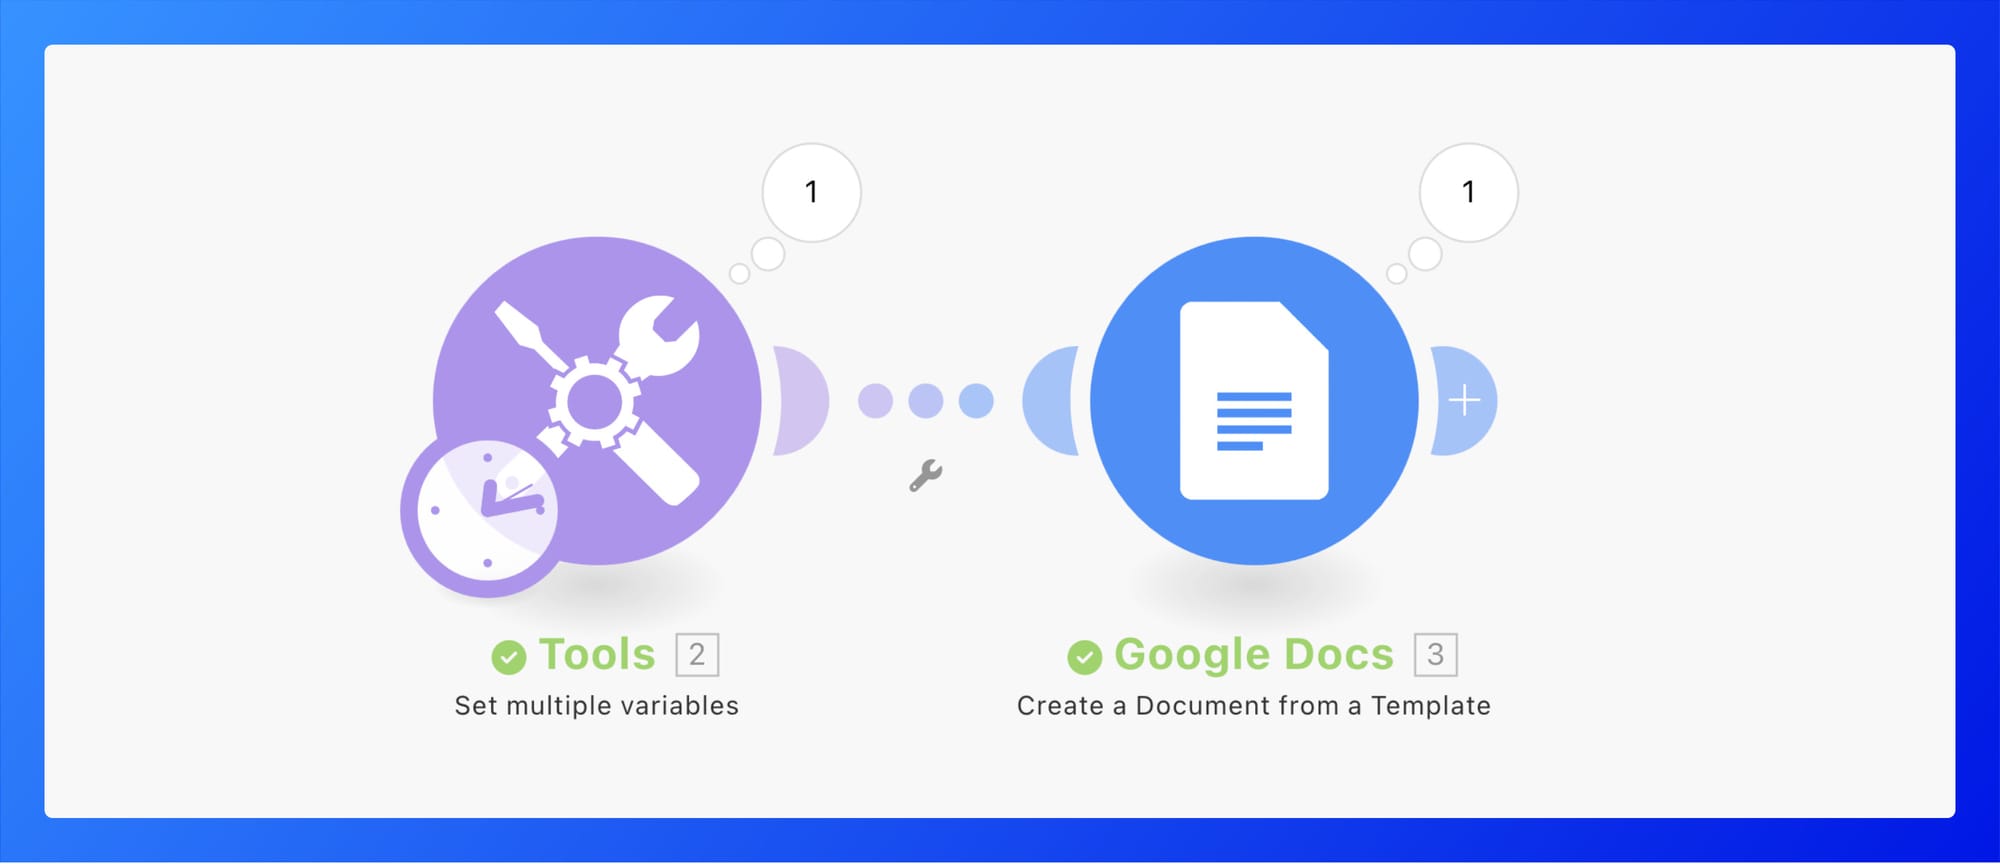
To automate the document generation: If you use Make, just copy the pre-created scenario to your account.
If you don't use Make, open your favorite automation service like Zapier, N8N, or Bubble, and follow those steps:
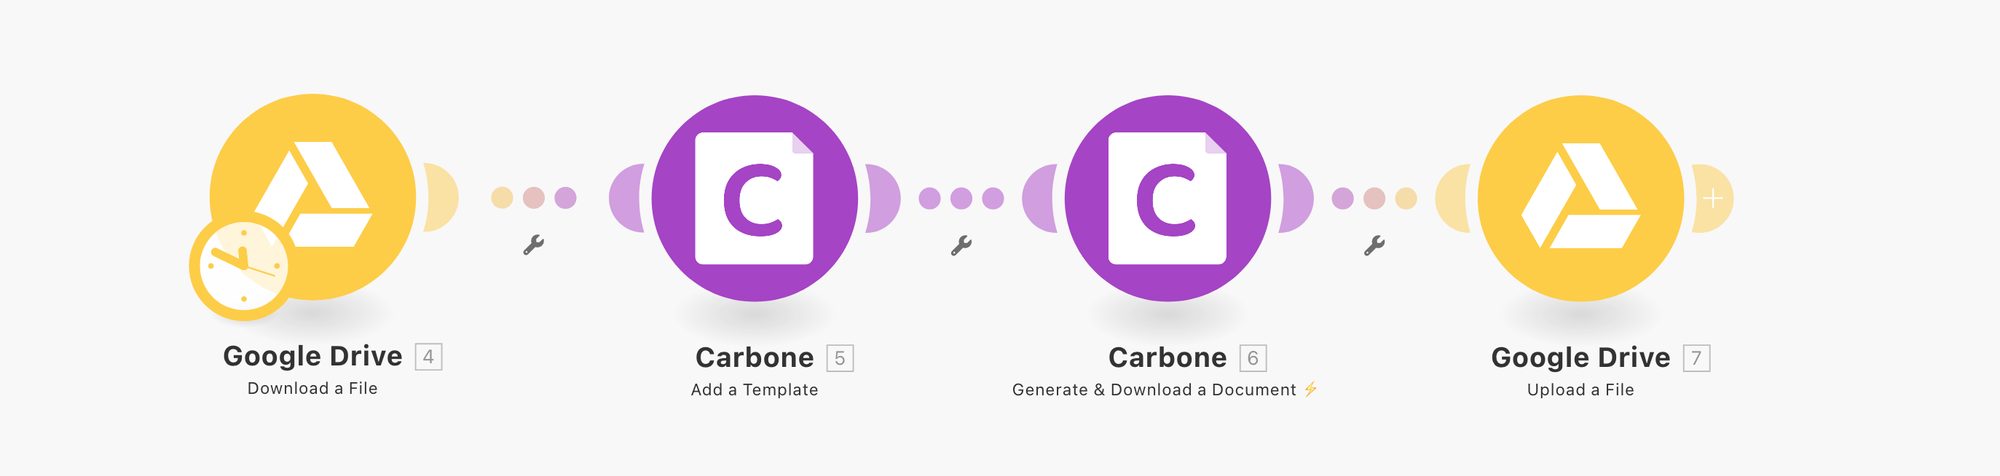
- First, create a Google Drive node to download the Google Docs template. Search for the action "Download a file". For our test, we are going to use an invoice as example; click to download the file.
- Create a second node, and search for the Official "Carbone" module:
- If necessary, log in to your Carbone Account by providing a test or production API key. Find your API key on your Carbone Account.
- Search for the Carbone action "Upload a Template", and pass as arguments the result of the first node "Download a file" from Google Drive.
- Create a third node, and search for the Carbone action "Generate & Download Documents ⚡️". You must provide as arguments:
- The template ID returned from the second node "Upload a Template"
- The data-set in JSON format that will be merged to generate the document. For testing purpose, we are going to use the following JSON data-set, click to download.
- Finally, create a last node to upload the generated document in Google Drive! Search for the action "Google Drive > Upload a file".
- Execute the scenario, and congratulations: you have automated the generation of your document! 🎉
Conclusion
In the end, while Google Docs gets the job done for basic document tasks, stepping up to something like Carbone can really open up new possibilities for creating dynamic and professional documents. It's all about finding the right tools that fit your needs and make your work easier and more efficient. So why not give these methods a try? Play around with the templates, see what works best for you, and check out some of the resources available to help you along the way. You might just find that perfect setup that saves you time and makes your documents look amazing!