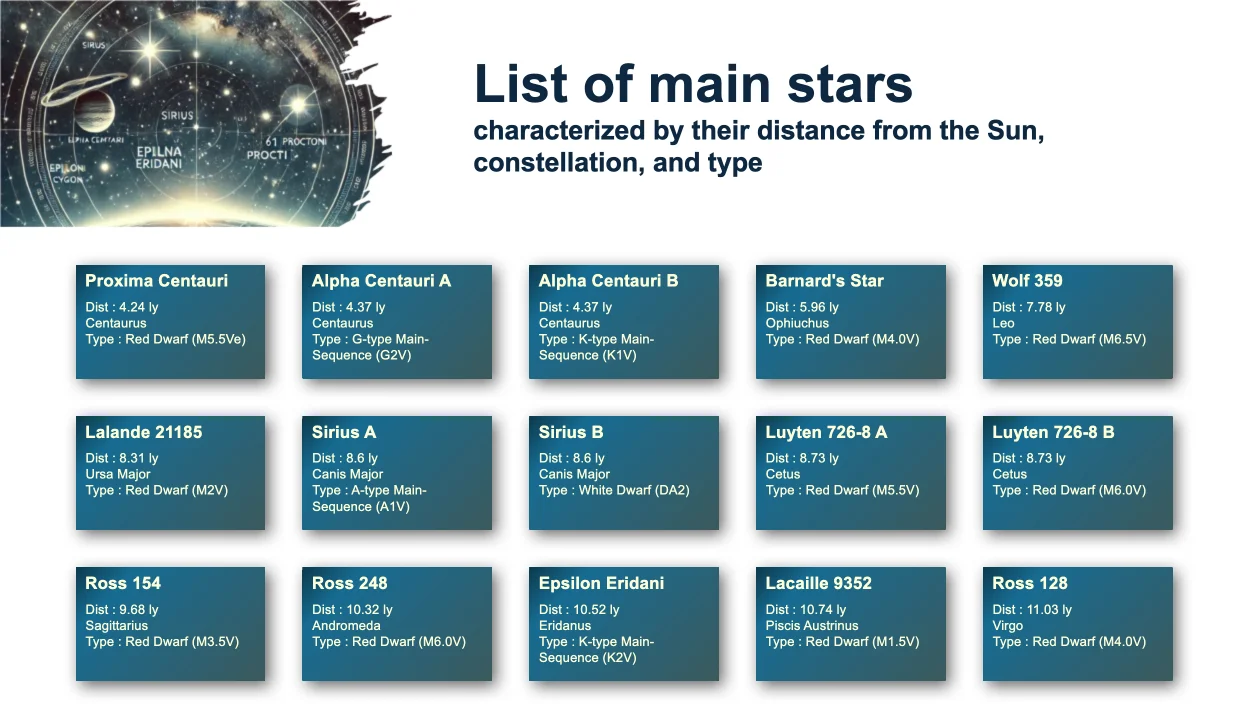
Grid layout in a presentation
Generate stunning slides effortlessly with Carbone
- Template type document pptx expert
- Carbone min. v5.0.0+
- Features loop transform
- Target bank insurance quote
Overview
Learn how to create a grid layout of objects in a PowerPoint presentation (PPTX) with these features:
- Automatically arrange items in rows and columns
- Create a responsive gallery layout
Note: This template works within a single slide. For larger grids, consider using a DOCX template with custom paper size (33cm x 19cm) or an ODP template.
Step-by-Step Solution
Follow these steps to create a grid layout in your PPTX template using Carbone:
1. Create the Base Shape
- Insert a shape (such as a text block) into your slide
- Add your content using Carbone tags
- Duplicate the shape and update the iteration syntax to
{d.stars[i+1]}
Tip: Always use shapes instead of images or tables for better results
2. Configure Grid Layout
- Right-click on the first shape
- Select View Alt Text menu
- Add the following transformation formulas:
{d.stars[i].starName:print(.i):mod(5):mul(6):transform(x,cm)}
{d.stars[i].starName:print(.i):div(5):floor:mul(4):transform(y,cm)}
These formulas control the grid layout:
:print(.i)- Gets the current loop iterator using the :print formatter:mod(5)- Sets number of items per row (5 columns) using the :mod formatter:mul(6)- Sets horizontal spacing (6cm) using the :mul formatter:transform(x, cm)- Applies the transformation on the x-axis in centimeters using the :transform formatter
The second formula works similarly but controls vertical positioning using :div(5):floor to calculate row numbers.
Related Examples
Trusted by 800+ paid customers in 40+ countries
Finance
Healthcare
Public
Retail
Industries
Energy
Software
Telecom