Mission Report
Create Professional Mission Reports with Carbone
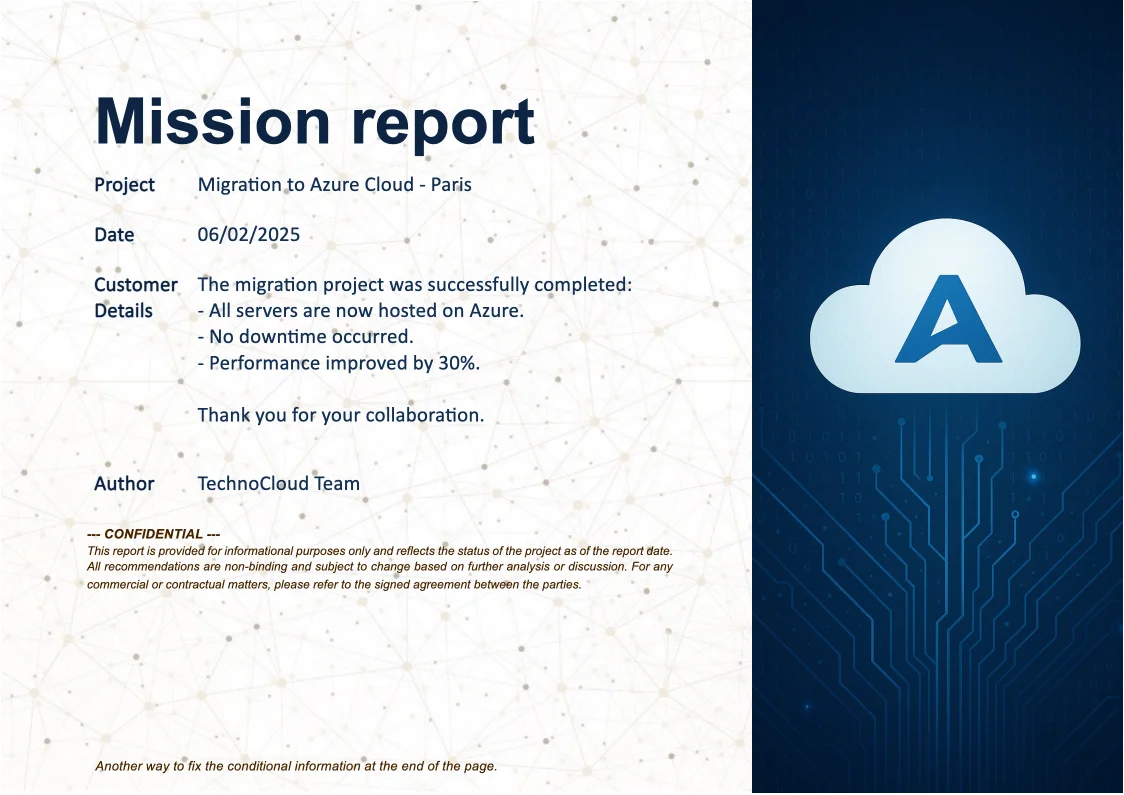
- Template type document docx simple
- Carbone min. v4.0.0+
- Features array filter
- Target mission multi-target
Overview
This guide shows you how to create a professional multi-target mission report using Carbone. You'll learn how to:
- Filter content based on different audiences
- Include fixed content sections
- Create a clean, professional layout
Step-by-Step Guide
We'll use a table-based template structure to ensure consistent formatting and proper content organization.
1. Create the Main Structure
- Set up a table in your document
- Remove table borders for a clean, professional look
2. Define Content
- Insert your data using Carbone tags (e.g.,
{d.project[i].characteristics.name}) - Create separate rows for filtered content:
- Client summary (
{d.project[i].clientSummary}) - Internal sales notes (
{d.project[i].internalSalesNotes}) - Technical details (
{d.project[i].internalTechDetails})
- Client summary (
- Apply consistent formatting to Carbone tags:
- Set appropriate font styles
- Configure spacing and alignment
- Use the :convCRLF formatter to properly handle line breaks (that eventually are in the datas)
3. Add Conditional Display Logic
- Use the :ifNE and :drop formatters to control row visibility
- Example:
{d.project[i].audience:ifNE(Client):drop(row)} - This ensures each content type displays only to the appropriate audience
4. Add Second Conditional Display Logic
- Use the :ifEQ and :showBegin / :showEnd formatters to control additional content.
- Example:
{d.project[i].audience:ifEQ(Client):showBegin} Content for client audience {d.project[i].audience:showEnd} - For a fixed content section:
- Insert a text box, and use the Alt Text menu to define the condition (e.g.,
{d.project[i].audience:ifEQ(Client):keep(shape)}) - Or, you can also anchor the text box between the two Carbone tags (
:showBegin/:showEndformatters). Then, lock the anchor in the Advanced Layout settings before adjusting the text box position
- Insert a text box, and use the Alt Text menu to define the condition (e.g.,
By following these steps, you'll create an efficient template that dynamically adapts your mission report content based on the target audience.
Related Examples
Explore these similar templates to learn more:
Trusted by 800+ paid customers in 40+ countries
Finance
Healthcare
Public
Retail
Industries
Energy
Software
Telecom