Self-hosted deployment
Deploy on Azure
Generate and manage your reports inside your own Azure environment using Container Apps
Introduction
Deploying Carbone in an Azure Container Apps environment is a very simple and effective way of implementing high-performance document generation while respecting your security and operation processes.
By default, the program runs with free Community features. To use Carbone Enterprise Edition, you need a Carbone license. Contact us to learn more, or request a free 30-day trial in our chat.
Deploy via Azure Marketplace
The fastest way to get Carbone running on Azure is our official listing on the Azure Marketplace: Carbone - Document generator. Click Get it now, sign in with your Azure account, and follow the guided deployment.
It deploys the same carbone/carbone-ee container image described on this page, so every environment variable covered in Configuration below — storage, Studio, authentication — applies the same way.
The listing is Bring Your Own License (BYOL): it costs nothing to deploy, but you still need a Carbone license to unlock Enterprise features.
The rest of this page walks through a manual setup with Azure Container Apps — useful if you want full control over storage, scaling, or authentication, or if you'd rather script the deployment (see the Terraform example below).
Quickstart
Create Azure storage for persistent data
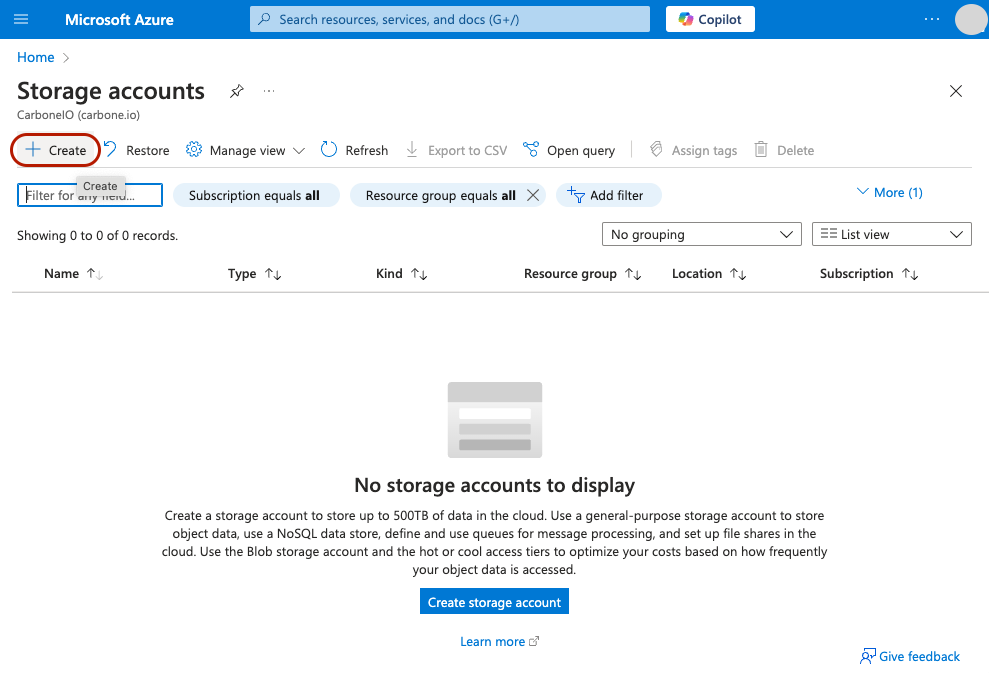
1. Create Storage accounts for Carbone
Go to Storage accounts section in Azure portal and click on Create:
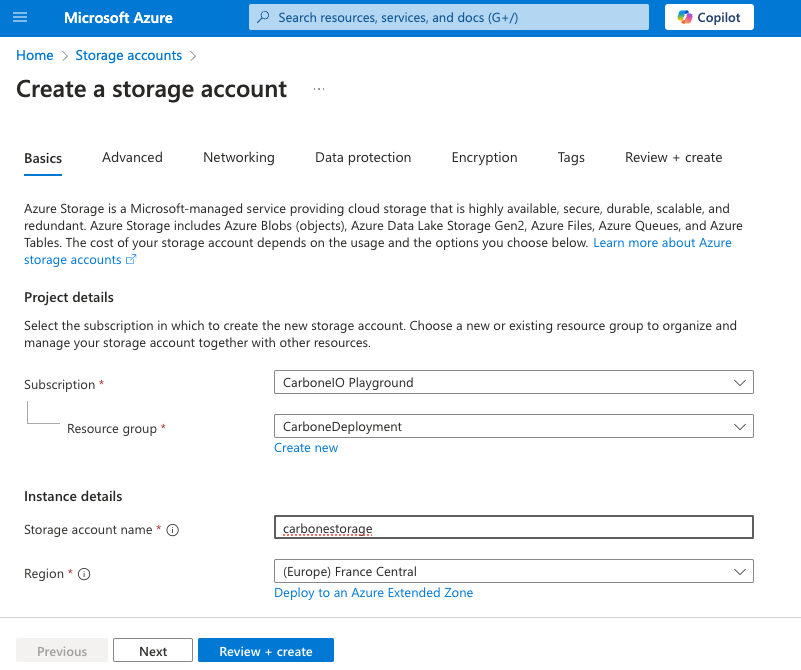
Then set storage name, following carbonestorage, click on Review + create and Create again:
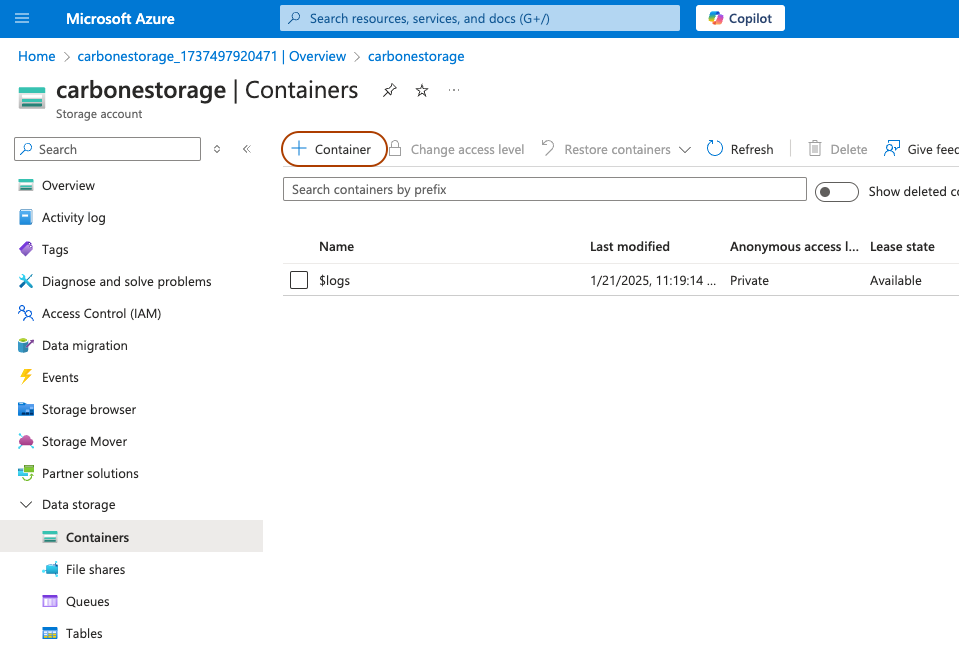
2. Create Template and Render containers
When the Storage Account creation is finalized, you can create 2 containers.
Click on Create in Data storage / Containers section :
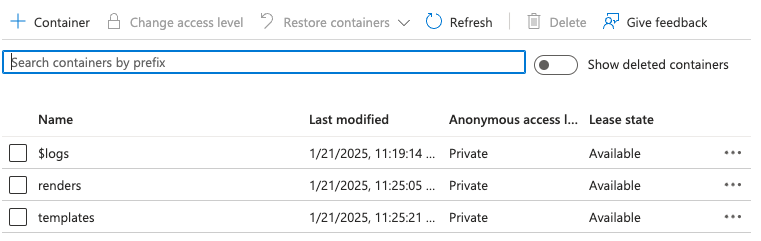
Then, create 2 containers : templatesand renders.
3. Get credentials
Finally, you need to get Storage Account Name and Account key from the Azure portal. Go to Security + Network / Access Key settings.
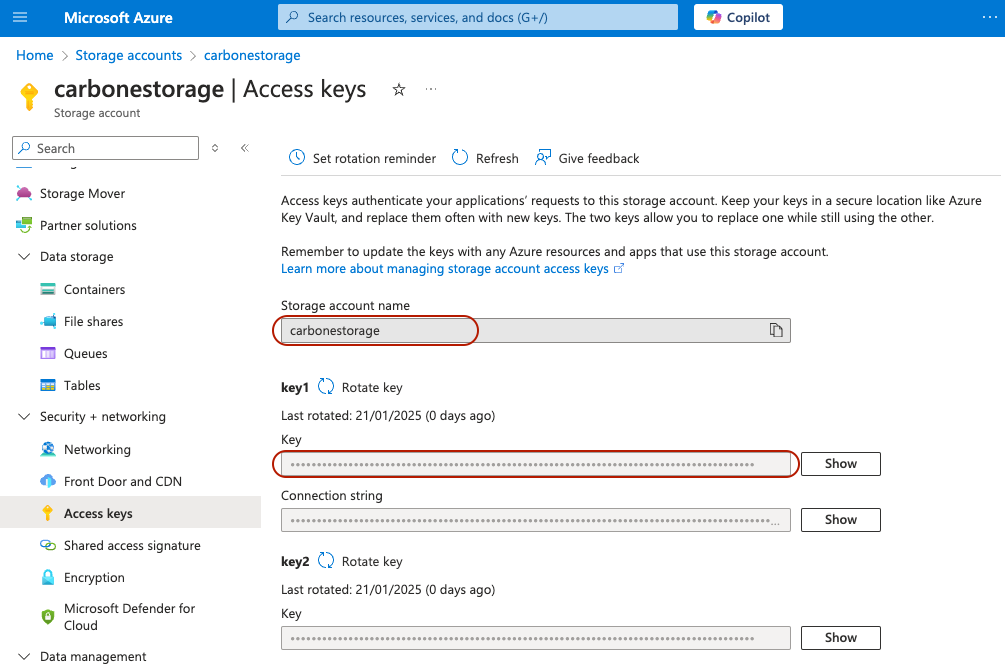
Keep these two values for the next step.
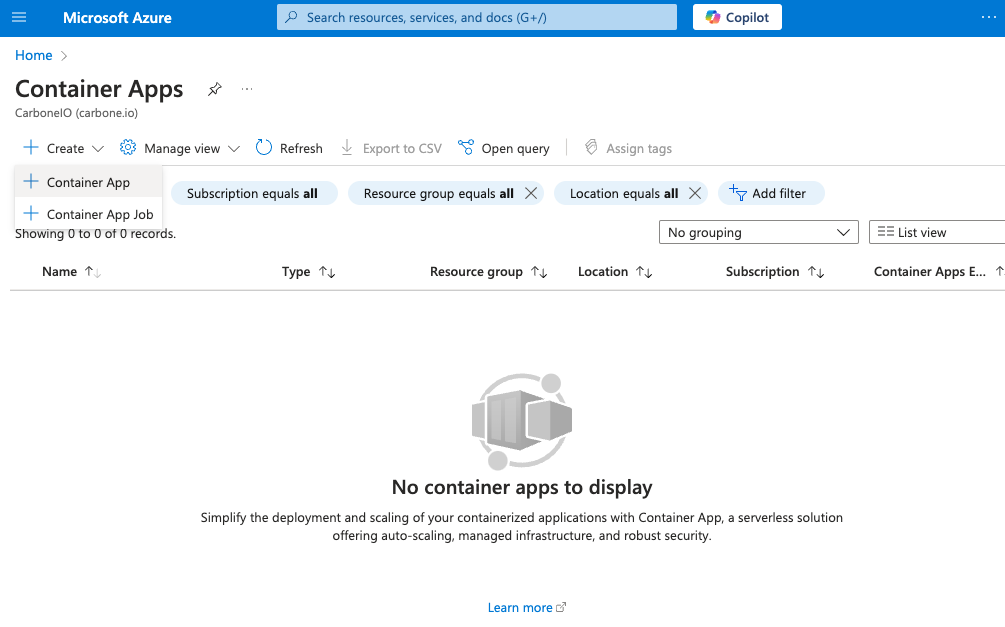
Create Carbone service
Go to Container Apps in the Azure portal, and create a new Container App:
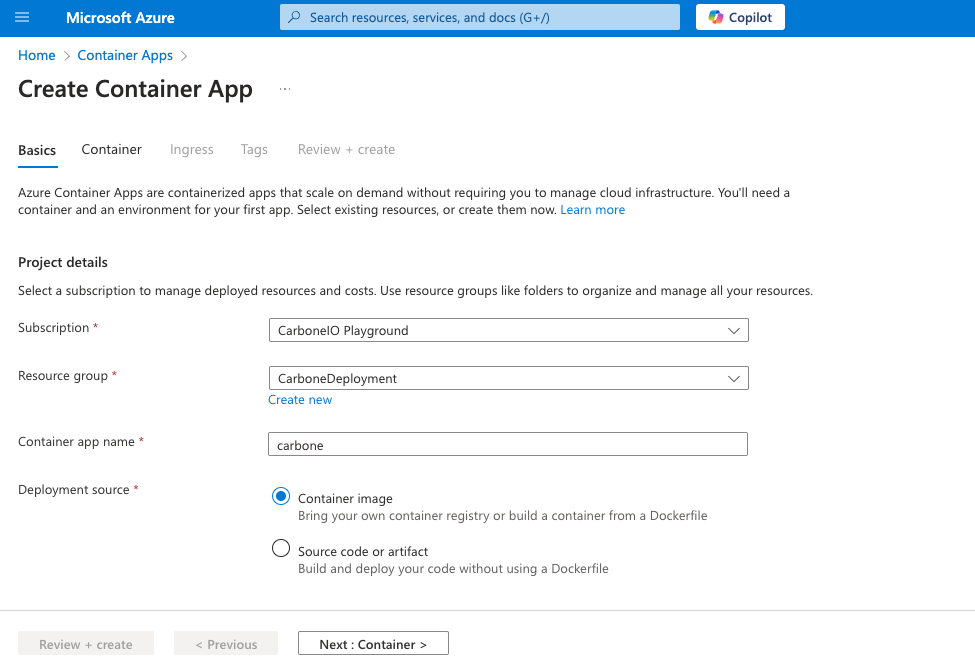
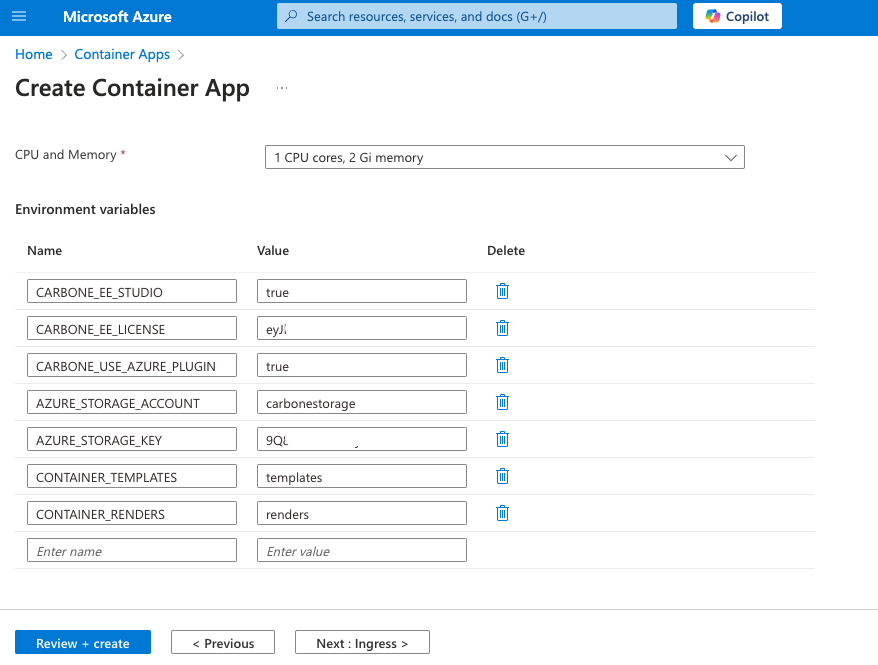
Create container carbone with following configuration.
Basic
- Container app name : carbone
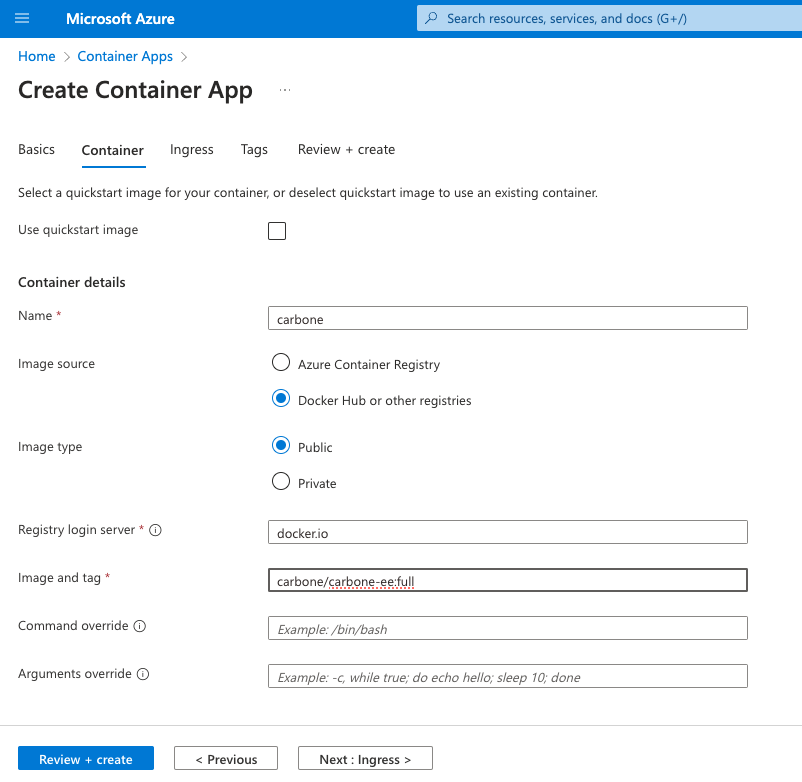
Container
- Image source : Docker Hub
- Image tag :
carbone/carbone-ee:full - CPU and Memory : 1vCPU, 2Gi memory
- Environment variables :
CARBONE_LICENSEwith your license to enable Enterprise featuresCARBONE_USE_AZURE_PLUGIN=trueAZURE_STORAGE_ACCOUNTwith Storage Account,carbonestoragein this exampleAZURE_STORAGE_KEYwith key from previous stepCONTAINER_TEMPLATEStemplate storage container nameCONTAINER_RENDERSrender storage container name
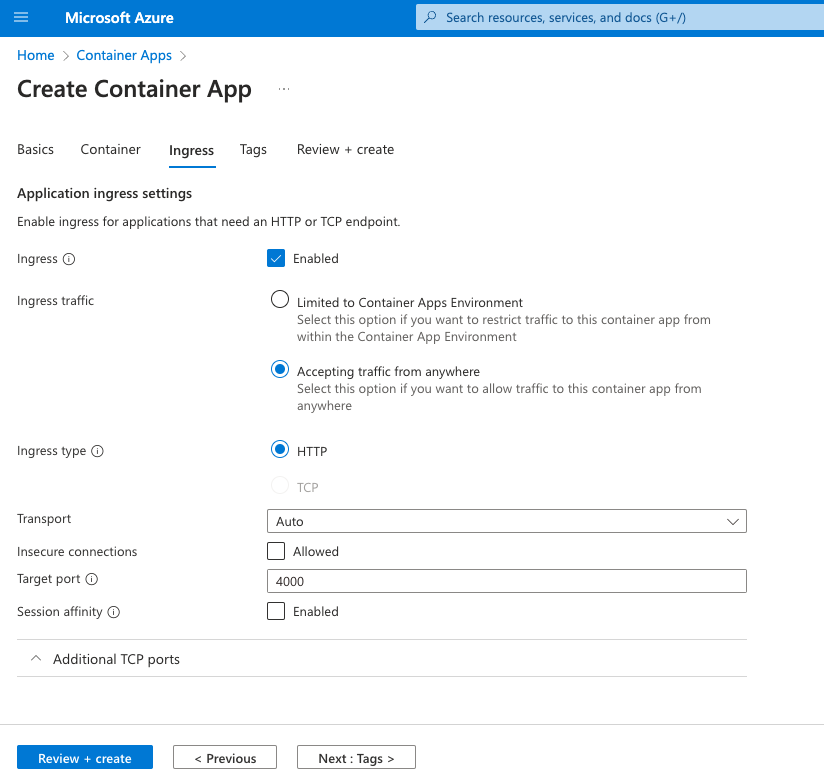
Ingress
For a simple test setup, enable full access and set port to 4000. For production, restrict ingress (limited/internal traffic) or enable Carbone authentication instead of leaving the API publicly reachable:
Enjoy Carbone
Your service is then available via the url of your Container App.
Configuration
Storage backends
As indicated in the quick start section, we recommend that you configure the Azure Blob Storage plugin to store rendering templates.
To do this, set the CARBONE_USE_AZURE_PLUGIN environment variable to true, then choose one of the following authentication methods (see the plugin documentation for the full reference).
System-assigned managed identity (recommended for Container Apps)
Enable a system-assigned managed identity on your Container App, grant it the Storage Blob Data Contributor role on the Storage Account, then set:
AZURE_STORAGE_ACCOUNT: Storage Account NameCONTAINER_TEMPLATES: Templates Storage NameCONTAINER_RENDERS: Renders Storage Name
No storage key to manage or rotate.
User-assigned managed identity
Same as above, but using a user-assigned identity — add its client ID:
AZURE_MANAGED_IDENTITY_CLIENT_ID: Client ID of the user-assigned identity
Shared key
Not recommended for production deployments on Container Apps — prefer a managed identity above.
AZURE_STORAGE_ACCOUNT: Storage Account NameAZURE_STORAGE_KEY: Storage Account KeyCONTAINER_TEMPLATES: Templates Storage NameCONTAINER_RENDERS: Renders Storage Name
Default Azure credentials
Set AZURE_USE_DEFAULT_AZURE_CREDENTIALS=true along with AZURE_STORAGE_ACCOUNT, then provide the additional environment variables required by DefaultAzureCredential — mainly useful outside Container Apps, for example for local development against a real Azure account.
Enable Studio
Just set CARBONE_STUDIO to true to enable Carbone Studio on your instance.
Authentication
To enable API authentication, you need to follow these steps :
- Set CARBONE_AUTHENTICATION to true
- Generate private/public Carbone Key
The key generation tool is included in the docker image from Carbone version 5 onwards.
docker run -it --platform "linux/amd64" carbone/carbone-ee:slim-5.0.0-beta.0 generate-keysThe two keys will be generated and displayed in the console.
Keep the private key content secure — it never leaves your machine, it is only used to generate JWT tokens. For the public key, store its content as a secret on your Container App (Secrets section), then reference that secret from the CARBONE_AUTHENTICATION_PUBLIC_KEY environment variable.
- Generate JWT token
Follow interactive shell :
docker run -it --platform "linux/amd64" carbone/carbone-ee:slim-5.0.0-beta.0 generate-token

## Paste in terminal content of key.pem
A JWT token is then displayed in the console. You can then use it in your API calls.
Scaling and availability
Azure Container Apps scales natively — no clustering or peer configuration needed, since template and render storage is external (Blob Storage, see Storage backends above).
In the Scale section of your Container App, configure:
- Min / max replicas: set a minimum above
0to avoid cold starts, and a maximum to cap cost. - Scale rule: HTTP concurrency (requests per replica) is the simplest trigger; CPU or memory-based rules are also available for conversion-heavy workloads.
Infrastructure as Code
Carbone autoscaling deployment with secret storage
A complete Terraform deployment example is available.
Upgrade
Azure Container Apps is revision-based: updating the container image or configuration creates a new revision. By default (single revision mode), 100% of traffic shifts to the new revision automatically once it's healthy. If you enable multiple revision mode, you can split traffic between revisions for a canary rollout.
Because templates and renders live in Blob Storage rather than on the container's local disk, deploying a new revision is safe and stateless.
Troubleshooting
Container logs. Use the Log stream tab on your Container App, or query the Log Analytics workspace linked to your Container Apps environment, for application-level errors.
Revision stuck in Activating / Failed. Common causes:
- Ingress target port doesn't match
4000(or your configuredCARBONE_EE_PORT). - Insufficient memory: LibreOffice conversion needs at least 2Gi — increase the container's memory allocation if the revision is OOM-killed under load.
- A referenced secret is missing or misspelled (for example
CARBONE_AUTHENTICATION_PUBLIC_KEYorAZURE_STORAGE_KEYpointing at a secret name that doesn't exist).
403 / connection errors to Blob Storage. Re-check AZURE_STORAGE_ACCOUNT and AZURE_STORAGE_KEY, and that the containers named in CONTAINER_TEMPLATES / CONTAINER_RENDERS exist (see Storage backends).