Self-hosted deployment
Deploy on Google Cloud Platform
Generate and manage your reports inside your own Google Cloud Platform infrastructure
Introduction
One of the best ways to deploy Carbone on your GCP environment is to use Google Cloud Run. Setting up a Carbone instance is very simple.
By default, the program runs with free Community features. To use Carbone Enterprise Edition, you need a Carbone license. Contact us to learn more, or request a free 30-day trial in our chat.
Quickstart
To set up Carbone, simply create a storage space, configure the license and launch the container on Google Cloud Run.
Create bucket to store template and renders
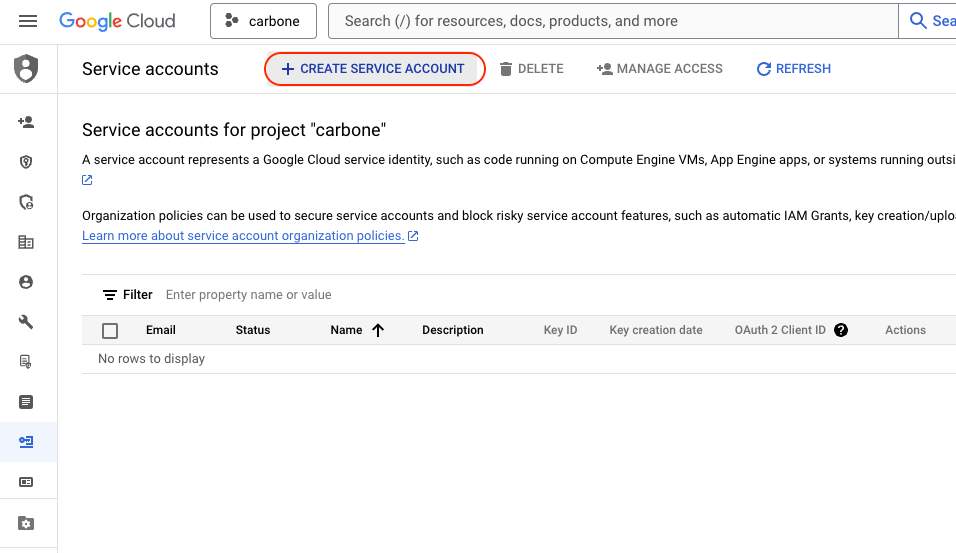
- First step is to create service account to enable Carbone to use a bucket in S3-compatible mode.
Go to Service account section in Google IAM Console.
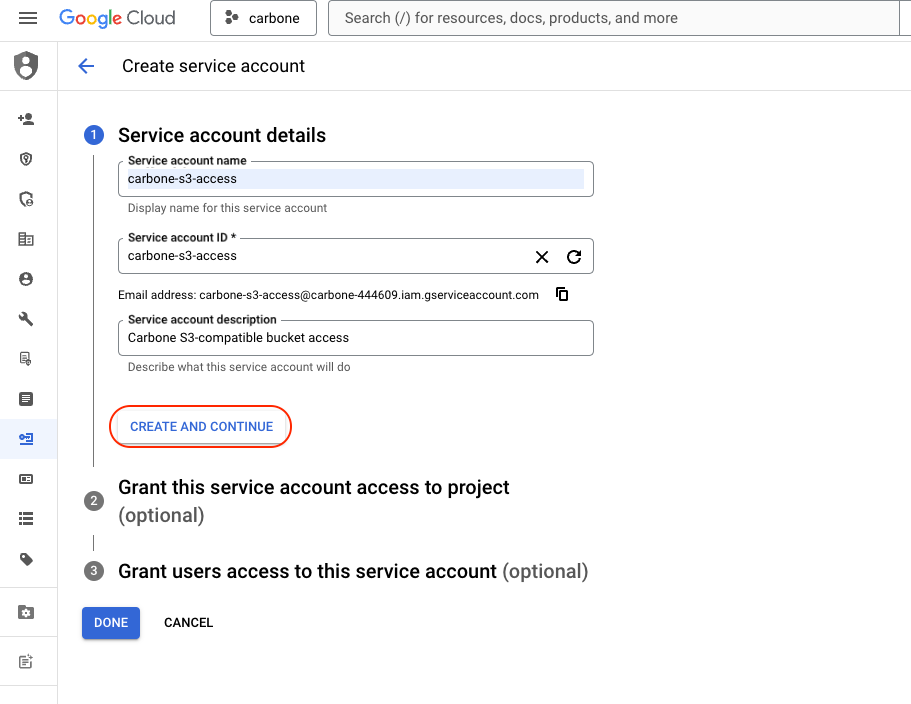
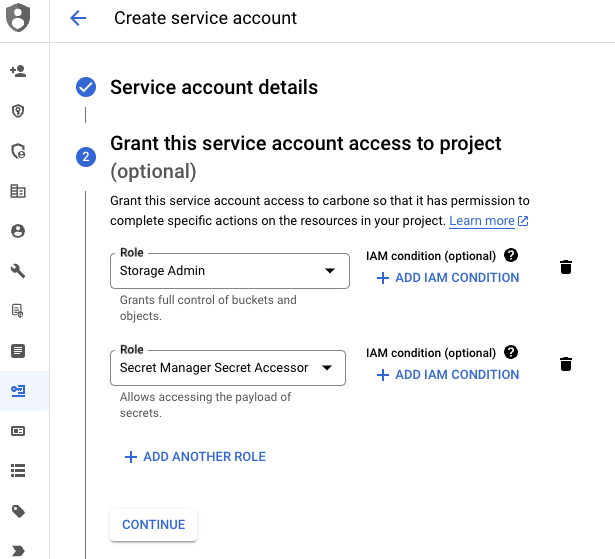
Create new service account. In this example, new user is carbone-s3-access and grant Storage Admin and Secret Manager Secret Accessor access :
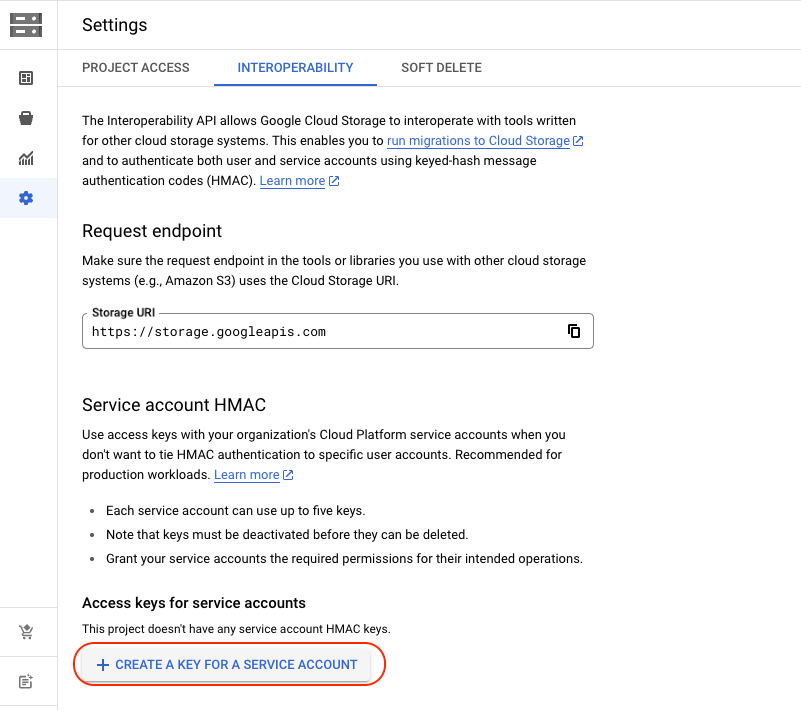
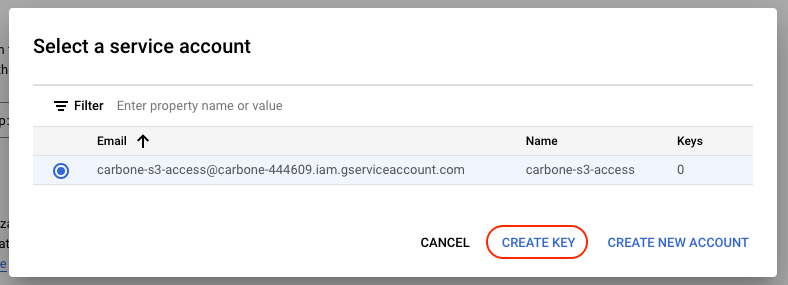
- Next, you must generate a key for this user
Go to Storage Setting, in Interoperability tab.
Click on "Create a key for a service account":
And create key for your service account:
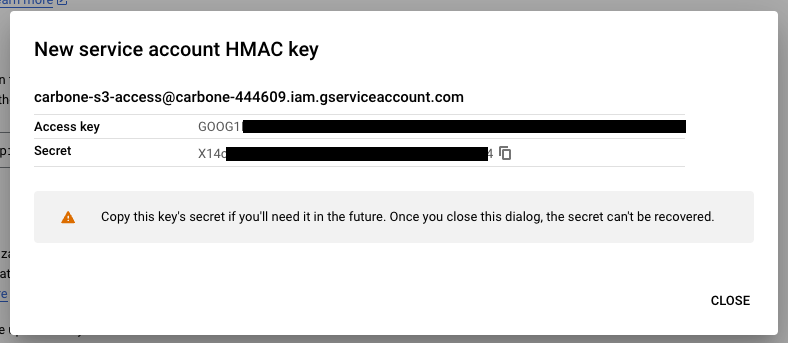
Retrieve the identifiers and keep them aside for the secret storage stage:
- Finally you should create 2 storage buckets
One storage space will be used to store templates, and the second for renders.
If the CloudRun configuration is limited to a single instance, renders storage is not required.
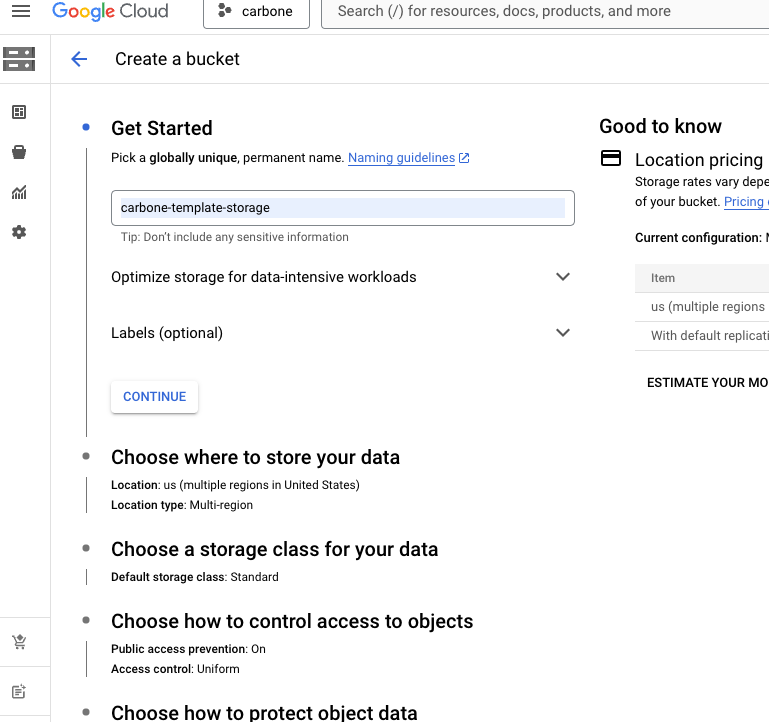
Go to Cloud Storage Console:
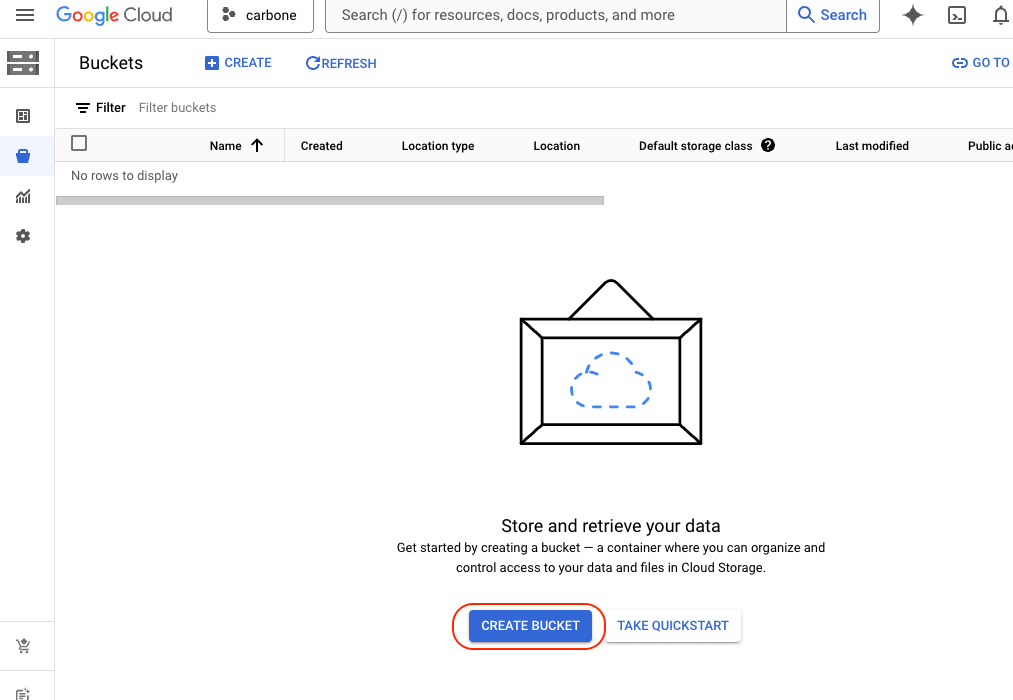
Create one bucket to store template and second one for renders. Just remember to use the right region.
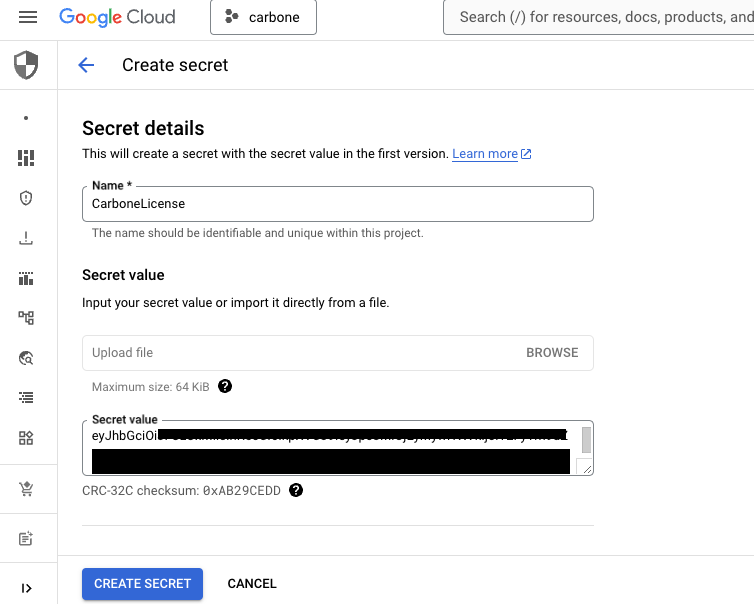
Storing Carbone licence and Service User key
We then recommend that you store all sensitive data in Secret Manager.
Create secret to store your Carbone License:
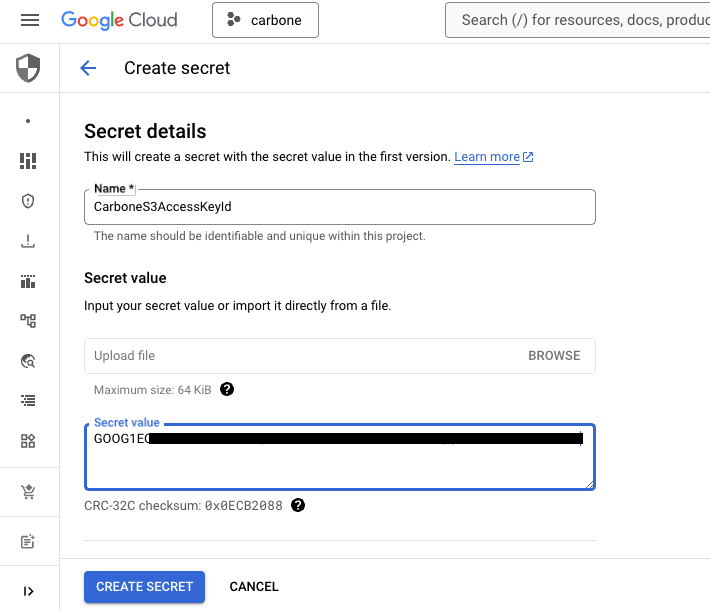
Create secret to store S3-compatible Access Key ID
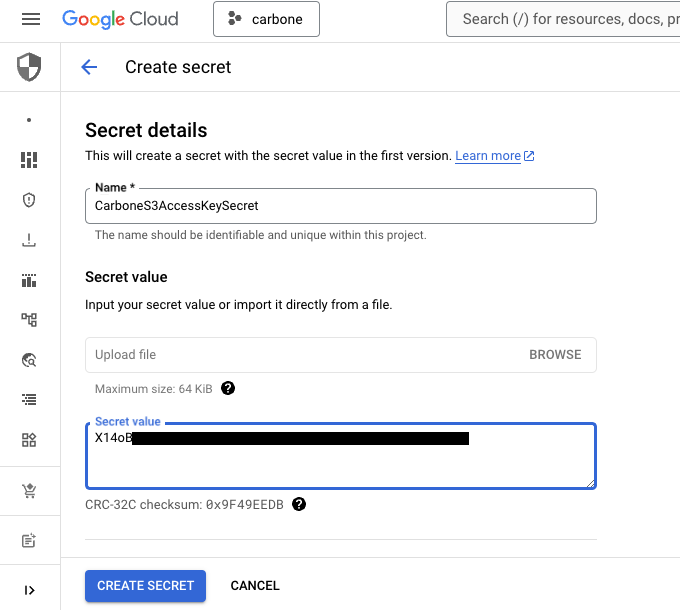
Create secret to store S3-compatible Access Key Secret
Create Cloud run instance
And finally, the very last step is to create the Carbone service on Google Cloud Run.
Go to the Google Cloud Run console and deploy a new
Service: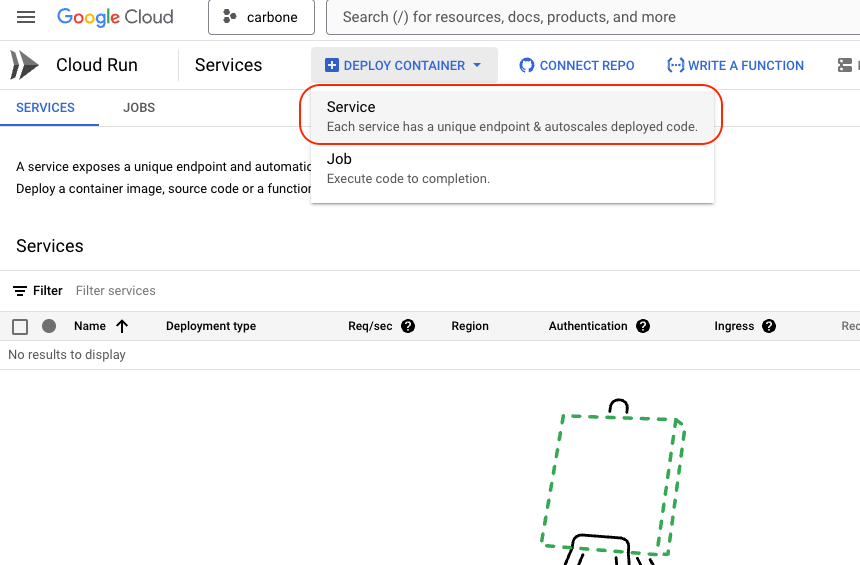
Configure the following items:
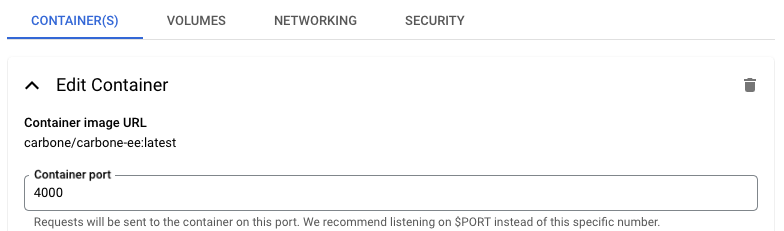
Container image URL

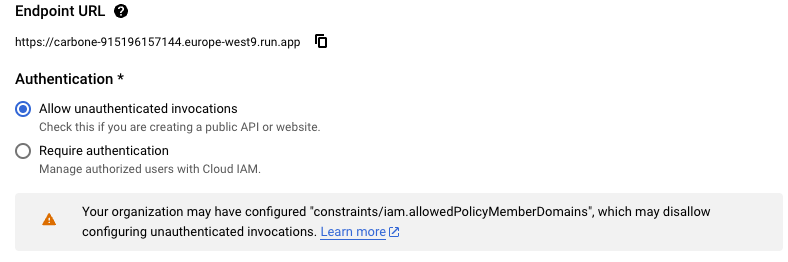
Authentication. For this simple setup we use "Allow unauthenticated invocations"
Container port:
Configure memory. Carbone need at least 1Go.

And finally following Variables and Secrets:
AWS_REGION,AWS_ENDPOINT_URL,BUCKET_TEMPLATES,BUCKET_RENDERS,CARBONE_LICENSE,AWS_ACCESS_KEY_IDandAWS_SECRET_ACCESS_KEY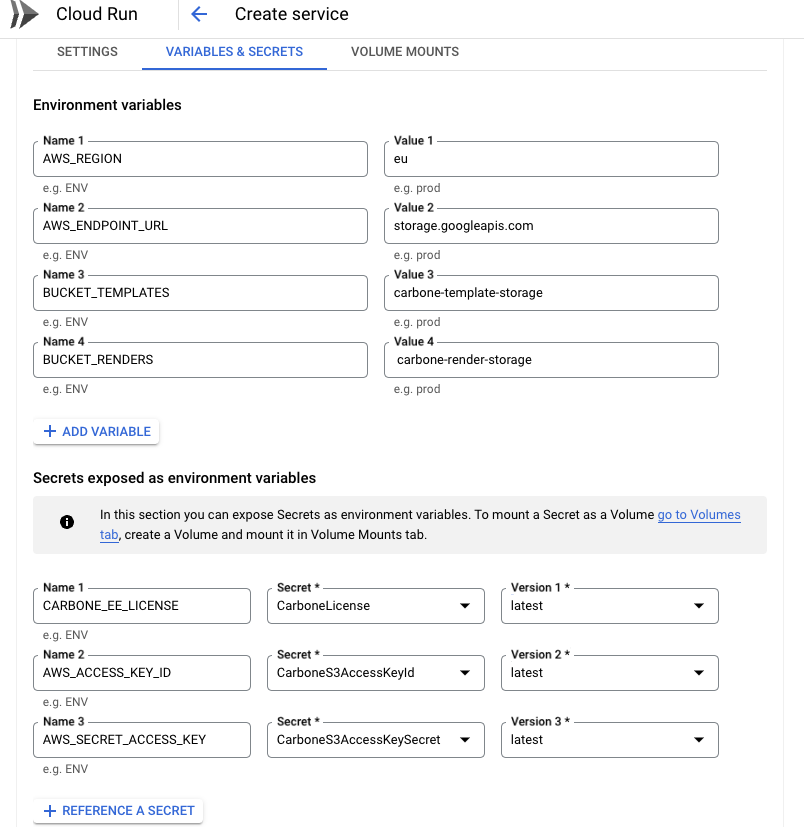
Et voilà 🎉. Your Carbone instance is available and you can check it by going to the URL of your Service. The Carbone version should then be displayed.
You can then use the API directly.
Configuration
The Carbone instance can be configured by setting environment variables: full documentation.
Enable Studio
The most popular option is to activate the Studio. To do this, simply set the CARBONE_STUDIO variable to true.
Secured access
If you're setting up Carbone on Google Cloud Run, it's essential to secure access to the server.
Here are 2 platform-level methods (see Authentication below for Carbone's own method):
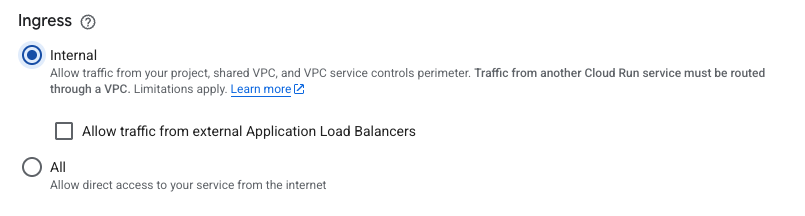
1 - Limit access to private request
With Google Cloud Run, you can accept requests from your internal network only. To do this, you need to activate “Internal” in the Ingress options:
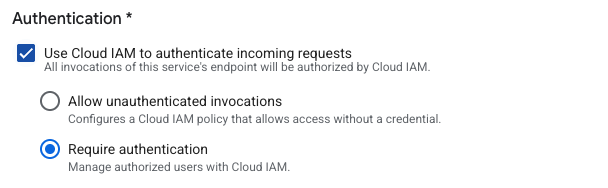
2 - Enable Cloud IAM authentication
You can also activate authentication with Cloud IAM. To do this, activate “Require authentication” and generate users with Cloud IAM:
Authentication
This is the authentication method included in Carbone and generic if you change hosting solution.
To activate this authentication you need to follow the steps below:
1 - Generate a public and private key pair
Our helper is available to generate these keys very easily. To do this, run the following command on your desktop:
docker run -t -i --rm -p 4000:4000 carbone/carbone-ee:full-5.0.0-beta.7 generate-keysThe key pair will then be displayed directly as follows:
JWT ES512 Key pair successfully generated (PEM format):

-----BEGIN PRIVATE KEY-----
MIHuAgEAMBAGByqGSM49AgEGBSuBBAAjBIHWMIHTAgEBBEIA0T65bCLNUerJEuiy
2rQzp7o9U/RYz6OOj4XhlKJKYUtdiPsARUhkzEwdbEWrZgZrFzXeET15topVwJJx
4QTvPRihgYkDgYYABAEQXmamk+cSkvll4ap3O2qxvIsWfw4ZwcK3f7N2LDG/KvZ0
AInWnQQk/Dl3iA+vHTxTpWqrFb3K6k0I/CW0n2FFrAGgdt/92NfW7K3ywZRsBgBa
AmcRqFaHVyjwTIvSFfzBpwWd2oXdAued9WioSV5apRSoRfTsEK87LVO0CpM3ajr/
nA==
-----END PRIVATE KEY-----

-----BEGIN PUBLIC KEY-----
MIGbMBAGByqGSM49AgEGBSuBBAAjA4GGAAQBEF5mppPnEpL5ZeGqdztqsbyLFn8O
GcHCt3+zdiwxvyr2dACJ1p0EJPw5d4gPrx08U6VqqxW9yupNCPwltJ9hRawBoHbf
/djX1uyt8sGUbAYAWgJnEahWh1co8EyL0hX8wacFndqF3QLnnfVoqEleWqUUqEX0
7BCvOy1TtAqTN2o6/5w=
-----END PUBLIC KEY-----
Then press 3 to get correct public key format. You will get this to be used in step 3 :
CARBONE_AUTHENTICATION_PUBLIC_KEY="-----BEGIN PUBLIC KEY-----
MIGbMBAGByqGSM49AgEGBSuBBAAjA4GGAAQBsV7hpKR2Lxg798k8qVejolEI/5K3
mdSk1jXiyHXCidyuz5Kgjw3OmhopcHJ7Wj72Xz/vKTwQgudA2q7jaIuDhJoAGlRP
XPgG946GDhHyB0h8v/M0LiPfJdp9dCgeI5SoWSLn3MJc3tCT0H3S9h9h64HmF4Iy
pKVP7NVkEF2ovowZt4Y=
-----END PUBLIC KEY-----"
2 - Save your private key The private key must remain secret. This key does not need to be installed on the cloud. It will only be used to generate JWT tokens.
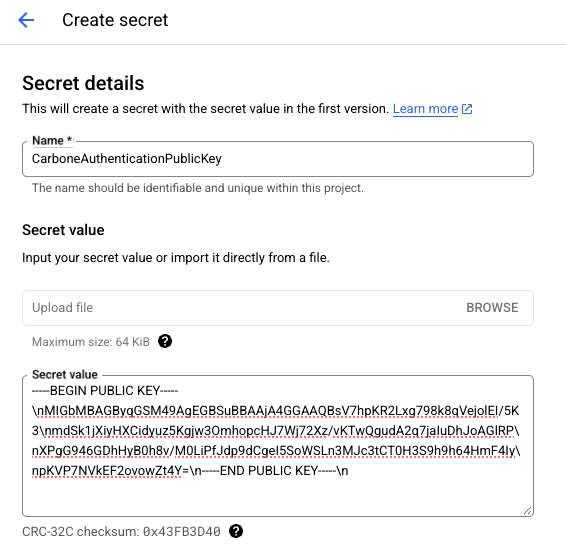
3 - Store the public key in Secret Manager
Create new secret called CarboneAuthenticationPublicKey and store public key from step 1 :
4 - Run Carbone with public key and authentication enabled
All that's left is to add the two environment variables:
CARBONE_AUTHENTICATION_PUBLIC_KEYtoCarboneAuthenticationPublicKeysecret valueCARBONE_AUTHENTICATIONto true
The Carbone instance is then ready to receive authenticated requests.
5 - Generate a JWT token All you have to do is create a JWT token with our helper :
docker run -t -i --rm -p 4000:4000 carbone/carbone-ee:full-5.0.0-beta.7 generate-token

## Paste private key generated in step 1 and pres 2 times Enter
You will get JWT token like this :
JWT token successfully generated:

eyJhbGciOiJFUzUxMiIsInR5cCI6IkpXVCJ9.eyJpc3MiOiJjYXJib25lLXVzZXIiLCJhdWQiOiJjYXJib25lLWVlIiwiZXhwIjozMDA3MDMwMDI3LCJkYXRhIjp7fX0.APGGFckrEy2an51UkAsngpp98lno5c_hMD54ZtnxjXQaM6ScMSCuOZZUT7Z_iGaHh2pM-3ki86wkglWV6NxS1JDEAfVE8EYdMp5qEUt9GQP1RAoLfmYCBdqR7bLTZiqAKfyWZREB6NHWajltwtoqelH7kitPa7kq7jhNW3xqcr-siRjF
6 - Use the API with the token
You must now add the following header to use the Carbone API:
Authorization : Bearer eyJhbGciOiJFUzUxMiIsInR5cCI6IkpXVCJ9.eyJpc3MiOiJjYXJib25lLXVzZXIiLCJhdWQiOiJjYXJib25lLWVlIiwiZXhwIjozMDA3MDMwMDI3LCJkYXRhIjp7fX0.APGGFckrEy2an51UkAsngpp98lno5c_hMD54ZtnxjXQaM6ScMSCuOZZUT7Z_iGaHh2pM-3ki86wkglWV6NxS1JDEAfVE8EYdMp5qEUt9GQP1RAoLfmYCBdqR7bLTZiqAKfyWZREB6NHWajltwtoqelH7kitPa7kq7jhNW3xqcr-siRjF
Scaling and availability
Cold boot
By default, Google Cloud Run allows you to switch off the Carbone instance if there is no usage. In this case, consider that the first Carbone call will take a little longer.
For your information, the cold startup time is around 3s for the full Carbone image.
Scalability
The strength of Google Cloud Run is that it supports Carbone scalability by default. You can therefore configure the minimum and maximum number of instances in the console.
Upgrade
Google Cloud Run is revision-based: deploying a new container image creates a new revision, and by default 100% of traffic shifts to it automatically as soon as it passes health checks. You can also configure gradual traffic splitting between the old and new revision from the console if you want a canary rollout.
Because templates and renders live in a GCS bucket (see Quickstart above) rather than on the container's local disk, deploying a new revision is safe and stateless — no data migration is needed.
Troubleshooting
Container logs. Cloud Run automatically exports container stdout/stderr to Cloud Logging — check there first for application-level errors.
Service fails to become healthy / times out on deploy. Confirm the "Container port" configured on the service (see Create Cloud run instance above) matches the port Carbone listens on.
403 errors calling storage or Secret Manager. Re-check that the service account attached to the Cloud Run service has the Storage Admin and Secret Manager Secret Accessor roles granted in Create bucket to store template and renders.
First request after idle is slow. This is the cold boot behavior above — set a minimum instance count if you need to avoid it.