Design
Getting started
Design your first template
Essential knowledge
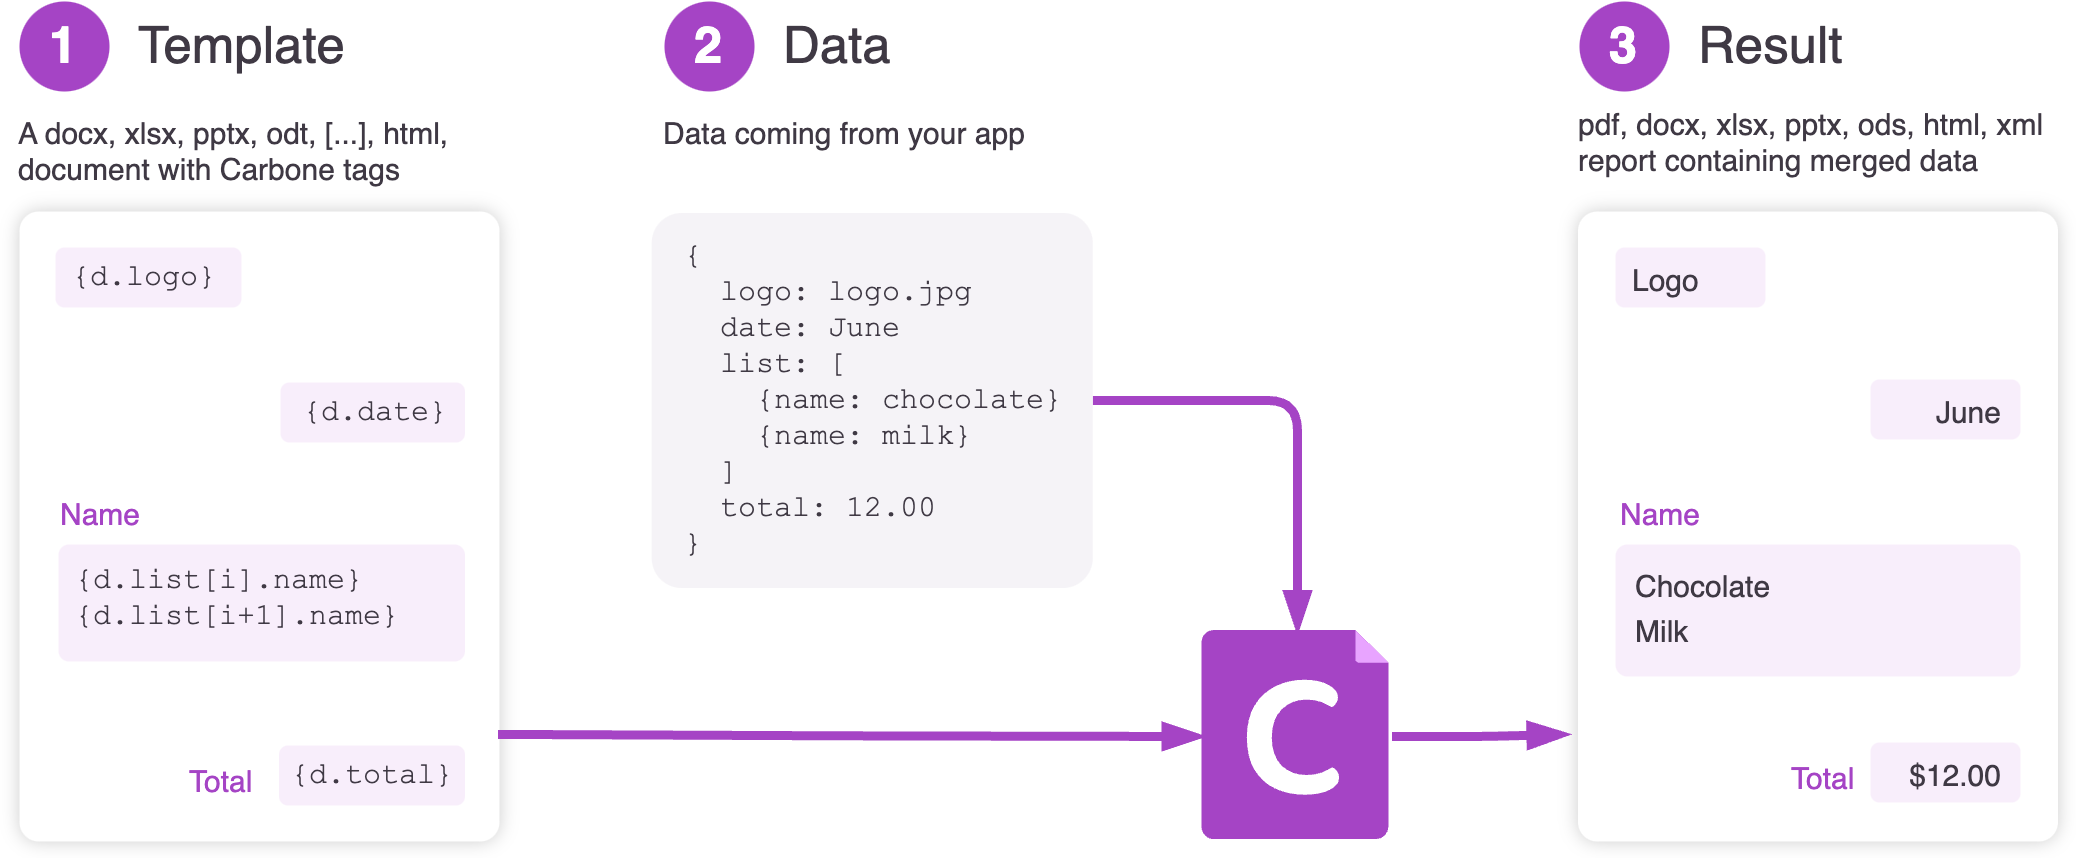
What is a template? A document created with the tool of your choice. It can be a DOCX, PPTX, ODT, HTML, MD, etc. Carbone supports almost any type of editable document.
What is a JSON? A way to organize and share information in a format that is easy for both people and computers to understand. The JSON is the data coming directly from your existing applications. Learn JSON.
What is a Carbone Tag? A placeholder (also called "merge field") in your template that indicates where data should be inserted. Carbone tags are written between curly braces
{}. Types of Carbone tags:{d.}: Injects data from the maindataobject. Examples{c.}: Injects data from thecomplementobject. More info{# }: Special tag to declare an alias (shortcut).{t( )}: Special tag for multi-language translation{o.}: Special tag to apply Carbone options: pre-release tags and arithmetic precision.
How does Carbone work? Carbone merges your template with the data and generates a new document.
What is a Carbone Formatter? A function (e.g.,
:lowerCase) that is added to the end of a Carbone tag to modify the data. What you can do with formatters:- Format numbers, dates, strings, currencies, etc.
- Create conditions,
- Perform mathematical computations, aggregations, etc
- Use them for advanced features such as inserting images, merging PDFs, parsing HTML, or applying colors, etc.
Generate a document
Designing a template is 80% about mastering your text editor (e.g., Microsoft Word, LibreOffice, OnlyOffice) and 20% about understanding the Carbone language, which is fully covered in this documentation.
- Use your text editor to add elements such as headers, footers, page numbers, and table of contents, ...
- Add Carbone tags to inject your data and see the result
Ready to generate your first document with Carbone? Just follow this quickstart tutorial to get started, then get inspired by one of our examples.
Next steps
We highly recommend starting with these two sections:
- Learn the basics: Substitutions
- Learn how to create loops to print a list of elements: Repetitions
The documentation is written with many easy-to-read examples, generated and executed by the latest Carbone version itself! This ensures the content is always up-to-date.
You may also be interested in:
- Configuring Microsoft Word/LibreOffice to simplify writing single quotes
- Choosing the best template type for your needs
- Making Carbone tags more compact
- Understanding the main supported templates and their features
- Using spreadsheet (XLSX, ODS) formulas in a template
- Exploring template examples
- The help center, which includes some (old) tutorials
👋 If you’re stuck, feel free to contact our support team via chat!